Author Topic: Project RM175F  (Read 40286 times)

0 Members and 1 Guest are viewing this topic.

Offline BAHNZY

  • Legend
  • *****
  • Posts: 1149
    • View Profile
Re: Project RM175F
« Reply #15 on: February 13, 2010, 08:29:01 pm »
Gotta say that whilst the conversion of the PE to a "RM Looking" machine looks/sounds easy enough, the mods to get the RM rear guard and side covers fitted was a nightmare, but worth the effort.

Mario, i have the tank from that bike, (i replaced it with a slighty better condition tank with decals) if you want to check out the fit and form. Let me know if you are interested.

Rod
Rod (BAHNZY) Bahn

monaro308

  • Guest
Re: Project RM175F
« Reply #16 on: February 14, 2010, 02:23:00 am »
Hi Rod...late reply....just back from the Southern 80 (well 1/2 of it)and off to a 4 y/olds birthday party for Sunday  ::)
Once I'm ready for the tank/seat part i'll try what i have again,but i'll let you know.
In your earlier post you said you have a few 84 frames...was that RM or PE frames?
Just curious as i was keeping an eye on a 84 RM125 frame on ebay which is pretty much the same as the 85 i have here.
I just checked to see if i won as i put a bid in 2 days ago when i left for Echuca.....no other bids and i did win it for ....99cents  ;D
I am going to cut into the 84 frame now and use that instead,i also bid on the front forks (43mm)and triples just for the hell of it and won them for $20.50 even though they are drum front on the 84......good for spares and may go on the PE in the future  ;)

Anyway.....just before i left i finished the shock rebuild (RM250)and took it into work to recharge it with nitrogen.


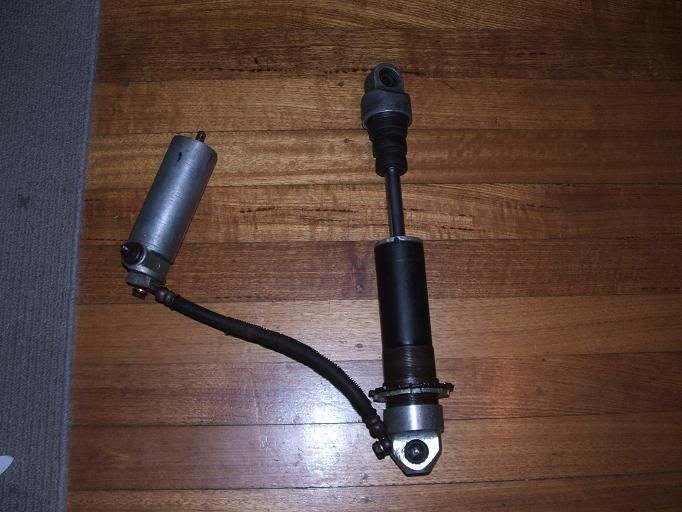
I pulled the spacer tube out of the rear cushion lever and noticed a few of the needle rollers were missing
and had to replace them and the 2 seals inside.
Suzuki wanted $30.00+ for each bearing (20x27x25) i got them for $33.00 inc gst for the 2 at my local bearing shop. NTN bearing # HMK2025
The genuine Suzuki seals were cheaper than aftermarket @ $7.00 each.


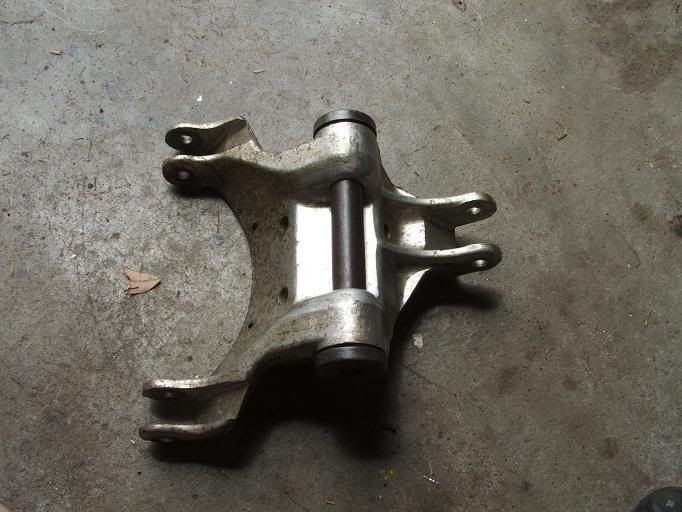
I also checked the swingarm bearings....same deal,but they take 20x27x20 bearings @$29.00 each genuine,and 4 seals.
Once again Suzuki seals were cheaper @$7.00 each,and i noticed there is a 10mm empty space between the outer seal,bearing and inner seal,so i was able to fit the another 2 of the above needle rollers 25mm wide against the 20mm and still have 5mm left....so $33.00 for the 2 again.
The strut bearings look and feel ok.....i'll check later on.
Thats it for now and i better get my arse into bed ready for a big day at a 4 year olds  :P
later.....

Offline BAHNZY

  • Legend
  • *****
  • Posts: 1149
    • View Profile
Re: Project RM175F
« Reply #17 on: February 14, 2010, 10:58:50 am »
Mario,
I have bought 4 RM125's of various 84/85 vintages all in different states of diss-repair and avalaible parts. Essentially all i wanted was to make a honest reproduction of the bike that was used in the 84 world championship. The bike is now finished and i have a couple of spare frames, swingarms wheels etc left over and in two minds what to do with them.

I also bid on the parts from Bittern (i got the air box and the front wheel assembly) and was going to have a crack at the forks and fell asleep and missed them. If you are looking for anything specific let me know and i'll chase through the boxes of parts.

PS: If anyone is thinking about building a 84 RM125 and is looking towards sourcing 1985 parts as your mate told you they are the same bike, that Suzuki just changed a sticker kit, then be aware there is a significant amount of changes in the bike where parts won't interchange, particulary the engine and suspension. I learnt the hard way on this one.

Rod
Rod (BAHNZY) Bahn

monaro308

  • Guest
Re: Project RM175F
« Reply #18 on: February 14, 2010, 08:09:45 pm »
Ahh bugger Rod,sorry about the forks,i had no idea that i was going to win it,especially that i was away for 2 days.
I assume the frames were similar?
Looking at my rear shock....it has confused the hell out of me,is it an RM250  ???
Going by Alpha's pics,it looks like an 84 but with the wrong hose and resi.
The bottom alloy bit of the shock just above the banjo bolt looks different to whats on other RM's
Got me wondering what i now have.
homework to do.......................

Offline BAHNZY

  • Legend
  • *****
  • Posts: 1149
    • View Profile
Re: Project RM175F
« Reply #19 on: February 14, 2010, 08:20:53 pm »
Went down to Bittern to pick up the wheel and air-box and low and behold the seller (Paul) is a VIPER rider. \
Small World it is after all.
Rod (BAHNZY) Bahn

monaro308

  • Guest
Re: Project RM175F
« Reply #20 on: February 15, 2010, 01:54:40 pm »
Hey Rod it is a small world...picked up the forks and frame from Paul this morning and got talking.His mate that looks after his rally RX7 works with me!
Sounds like he is chasing another swingarm for his PE175D...has cracks around the s/arm pivot area...so if anyone out there has one,i will forward it on to him.

OK....straight into it,got the frame home and disassembled the 85 frame and hooked into the 84 frame.
Looks exactly the same but the shock resi bottom mount is narrower.I will modify that later.
I cut out the frame tube at the airbox to clear the barrel and head,but i left the bottom part of the airbox mount.


Sat the engine in the frame and only had to notch out the inner webbing of the front down tube.


Machined up 2 spacers for the bottom engine mount and pushed the PE bolt through (i will need the RM bolt as its shorter,anyone have one?? I'll get the lengths later)


I sat the airbox in and the bottom back section hits the engine mount bracket....so this will need work.


Hits here...
Hey Rod if that airbox you got is average around that bottom area,let me know as mine is fine and i'd rather butcher an average one and give you mine.


Now this will need time spent here...


Fitted up the dummy radiators to see for clearance around the head...all ok so i can think about making twin tanks for fuel...(if i really want to)

Thats all for today...off to work ::)

PS DOC...brackets got mailed out this morning to you
« Last Edit: February 15, 2010, 01:59:13 pm by monaro308 »

Offline vandy010

  • Legend
  • *****
  • Posts: 1982
  • #789 MX125a BMCC Brisbane
    • View Profile
Re: Project RM175F
« Reply #21 on: February 15, 2010, 02:14:21 pm »
interesting thread Monaro.
i'm enjoying the read. keep it up champ.
 8)
"flat bickie"

Offline BAHNZY

  • Legend
  • *****
  • Posts: 1149
    • View Profile
Re: Project RM175F
« Reply #22 on: February 15, 2010, 04:40:16 pm »
Rather than replacing the bolt with a correct bolt, go for a length of all stainless all-thread and use some nylocks and washers on each side. Cheapest and easiest way around replacing those long specialist length Suzuki bolts.
Rod (BAHNZY) Bahn

monaro308

  • Guest
Re: Project RM175F
« Reply #23 on: February 16, 2010, 01:39:36 pm »
I thought about using all-thread but i'm not sure of the damage that the thread can do to the engine casing holes internally.....vibration does magic things when the two don't gell.
I'll put my wanted list up soon in the wanted section,because the fun now starts..........

I cut the drain section off the back of the airbox to clear the back mount.
It now fits nice and i will blank it off later with a small drain tube.


Now with the boot on,it actually lines up to the inlet almost spot-on,but i have less room for the carby to fit.


This is with the original PE carby


This is with the flatslide that came with all the parts....
A VM34SS I need the top cover and slide and needle...all missing


With the flatslide i have about 10mm more room and will most likely go this way if i can find the slide,needle and cover bits.
The PE inlet rubber is a straight shot and the RM rubber is angled.The RM one helps the carby clear the side of the airbox but puts the angle out.The PE one is good and the side of the carby just rubs on the airbox.5mm spacers on the airbox-frame will clear it.


Thats as far as i got today and all these little things are going to be the time consumers.
I have to work out what to do to shorten the airbox rubber to connect to the carby.
Once that is done the next issue is expansion chamber....that is gonna be a beauty to sort out.
The rest is pretty much bolt on stuff and the lighting side of it will be last.

Thats it for another day and its slow going from here on in.
Cheers....Mario

monaro308

  • Guest
Re: Project RM175F
« Reply #24 on: February 19, 2010, 12:52:07 pm »
Back again  ;D
I cut the airbox boot to where i needed it.


I taped up the two pieces to hold it together and applied Sikaflex/urethane to the outside,and then let it set for a day. (No matter how hard you try to avoid getting that sh1t on you with gloves and all....it ain't gonna happen!)


Trial fitting and i ended up using the RM angled inlet rubber as it sat better after curing.
Airbox bolted up fine and the boot fitted on the carb ok without much pressure.
I'll keep it on for a few days and keep an eye on the boot to see if it holds up,I might do another layer of urethane if i'm not happy.


I started to do a rough assembly of the bike to get and idea of what it might look like....
Check out  "Make Me A Super Model" topic.

Later...Mario


Offline LWC82PE

  • Superstar
  • ******
  • Posts: 6006
    • View Profile
    • PE motorcycles & SuzukiTS.com
Re: Project RM175F
« Reply #25 on: February 19, 2010, 01:14:21 pm »
www.iwt.com.au in Adelaide should have the carby bits you need for that flatslide.

Wanted - 1978 TS185 frame or frame&motor. Frame # TS1852-24007 up to TS1852-39022

DR

  • Guest
Re: Project RM175F
« Reply #26 on: February 19, 2010, 01:31:24 pm »
she's looking good Mario, no mucking around and nice work 8)

PS The brackets arrived in the mail today, thanks ;D

monaro308

  • Guest
Re: Project RM175F
« Reply #27 on: February 19, 2010, 02:20:59 pm »
Thanks for that link Leith...helpful.
I'll do a wanted list.....i keep saying that...but i will this weekend and try on here first,if no one has any roughie TM carbs i'll do US ebay and then IWT...thanks again!

Thats the problem Doc,i seem to ignore other crap going on around the house and jump into my projects.
Always been like that and don't know when to stop and i'm not the type to just sit around and watch TV (unless Collingwood is playing  ;D)then i go watch it in the shed  ::) i enjoy working on bikes instead of cars everyday.

Were the brackets correct Doc? Hope so and better you using them than sitting around.
Cheers.

Offline ty4

  • A-Grade
  • ****
  • Posts: 385
    • View Profile
Re: Project RM175F
« Reply #28 on: February 19, 2010, 10:14:34 pm »
what length bolt do you need, have some out of a jap car that are stepped, may get you out of trouble
tony

monaro308

  • Guest
Re: Project RM175F
« Reply #29 on: February 20, 2010, 01:36:26 am »
Hi Tony,alpha-sports show it as a 150x8mm bolt...and i didn't even think about jap cars,good point  ;)
I'll measure up the rear mounts too because i used slightly thicker steel than what the PE had,the nuts bottom out to soon.
I might tackle the front mount plates this weekend.....maybe the pipe too
Thanks.....mario