Author Topic: Project RM175F  (Read 40127 times)

0 Members and 1 Guest are viewing this topic.

Offline lukeb1961

  • Legend
  • *****
  • Posts: 1019
  • PE175N, RM80B, JR50C
    • View Profile
    • PE175N
Re: Project RM175F
« Reply #105 on: March 27, 2010, 08:29:51 pm »
as for quiet, get a PE400 muffler, or make something of similar dimensions.
Excellent at keeping the racket down with no performance headaches.

e.g. here is my PE175N with a thumping great muffler that works very well indeed.
http://members.optusnet.com.au/pe175n/PE175N03Aug2008.jpg
Luke

monaro308

  • Guest
Re: Project RM175F
« Reply #106 on: March 27, 2010, 11:47:49 pm »
Thanks Luke.
I'll have to work with the sidecover thats on the RM.
I have an WR250F muffler that i can modify with a perforated centre or maybe the later oval WR450F type would fit better.
There are endless ways i can go.
Frosty may have a PE muffler that i can keep for my PE and then i can use the modded one that came with my PE.
Your PE looks great too.
cheers...mario

Offline LWC82PE

  • Superstar
  • ******
  • Posts: 6006
    • View Profile
    • PE motorcycles & SuzukiTS.com
Re: Project RM175F
« Reply #107 on: March 27, 2010, 11:57:08 pm »
Also a lot of guys use NOS or good used Pro circuit/FMF/Answer mufflers off ebay for later 80's bikes like KDX200 or enduro mufflers made for RM 250's etc and modify a mount or 2 and that way they have a cool looking functional and rebuildable alloy muffler at a a cheap price.
Wanted - 1978 TS185 frame or frame&motor. Frame # TS1852-24007 up to TS1852-39022

monaro308

  • Guest
Re: Project RM175F
« Reply #108 on: March 28, 2010, 12:03:21 am »
Thats a better idea Leith  ;)

Offline LWC82PE

  • Superstar
  • ******
  • Posts: 6006
    • View Profile
    • PE motorcycles & SuzukiTS.com
Re: Project RM175F
« Reply #109 on: March 28, 2010, 12:41:40 am »
yep i know a few guys who have fitted later model aftermarket alloy mufflers to the full floater PE's. I dont know what models exactly but something for a late 80's/early 90's that just requires a bit of a bracket change.
Wanted - 1978 TS185 frame or frame&motor. Frame # TS1852-24007 up to TS1852-39022

Offline frostype400

  • Legend
  • *****
  • Posts: 2496
    • View Profile
Re: Project RM175F
« Reply #110 on: March 28, 2010, 09:51:17 am »
Gday Mario sorry mate I have been busy but pm your address and I will send that 175 muffler thanks michael.
1971 tm400 and PE's

DR

  • Guest
Re: Project RM175F
« Reply #111 on: March 28, 2010, 12:29:38 pm »
Mario the later RGV250 mufflers are worth a thought also to retain the an OEM status..I hunt these down whenever possible. Along the way I've picked up a couple of nice lighter than air carbon fibre jobs also which were a bonus. Regular supermarket price is about $50 the pair ;)
« Last Edit: March 28, 2010, 12:31:17 pm by Doc »

monaro308

  • Guest
Re: Project RM175F
« Reply #112 on: March 29, 2010, 01:02:17 am »
No problems Michael,PM sent and thanks.

Doc i occasionally look at RGV stuff just for the hell of it...well more because i used have a '91 M model and love the look of the banana swingarm...lol
There still seems to be a lot of interest in RGV stuff and gets the dollars for spare parts and i'll keep an eye out like you said.

Thanks mario

Offline Marc.com

  • Legend
  • *****
  • Posts: 3887
    • View Profile
Re: Project RM175F
« Reply #113 on: March 29, 2010, 06:41:44 am »
looks really great Mario don't change a thing. Nice job.
formerly Marc.com

suzuki43

  • Guest
Re: Project RM175F
« Reply #114 on: March 29, 2010, 12:58:31 pm »
Look out the latin lover is back from Mexico!

Offline Marc.com

  • Legend
  • *****
  • Posts: 3887
    • View Profile
Re: Project RM175F
« Reply #115 on: March 31, 2010, 09:12:37 pm »
Look out the latin lover is back from Mexico!

yes indeed, back from the pool bar and the help yourself Carona tap. Now if I can just shake the foot poisoning I will be laughing.
formerly Marc.com

monaro308

  • Guest
Re: Project RM175F
« Reply #116 on: April 15, 2010, 01:18:28 am »
Alls quiet on the bike build at the moment as i have been waiting on parts to arrive.
Luckily the carby problem has been sorted out which was a head ache and turned out to be the wrong jet needle (5+mm too short) and fuel was getting sucked straight out of the main jet.

Forks have been apart and cleaned up and ready to re-assemble.
Parts arrived today....fork seals,fork boots,uni filter,o ring chain,gear lever,pilot jets and needle/seat.

Trying to work out what fork oil weight would suit me....80kg with riding gear...any tips out there?
Next on the list is the extra tank/container to fill in the left side radiator shroud.
Also been sorting out the clutch and brake levers and the little petty things on the bike.
Barkbusters are also on the list.
I thieved the front tyre and tube from the PE and thats done.
So i'll get back into it tomorrow with more pics on the weekend.
cheers

Offline lukeb1961

  • Legend
  • *****
  • Posts: 1019
  • PE175N, RM80B, JR50C
    • View Profile
    • PE175N
Re: Project RM175F
« Reply #117 on: April 15, 2010, 03:58:43 pm »
Trying to work out what fork oil weight would suit me....80kg with riding gear...any tips out there?
  80kg - 10w would be fine.

monaro308

  • Guest
Re: Project RM175F
« Reply #118 on: April 16, 2010, 01:13:39 am »
Thanks Luke.I ended up getting 10w this morning and put them together.
Gotta hate it when you have to buy 2x1lt bottles @$42.00 because the forks take 550ml in each leg leaving me with a 900ml bottle  ::)
Oh well thats bikes for ya.
Cheers...mario

monaro308

  • Guest
Re: Project RM175F
« Reply #119 on: April 19, 2010, 12:05:04 pm »
Back again!
After a busy week of work,vet visits,b/day parties...it was time to get back into the bike.
New fork seals were fitted and 10w oil put in and the forks re-assembled.
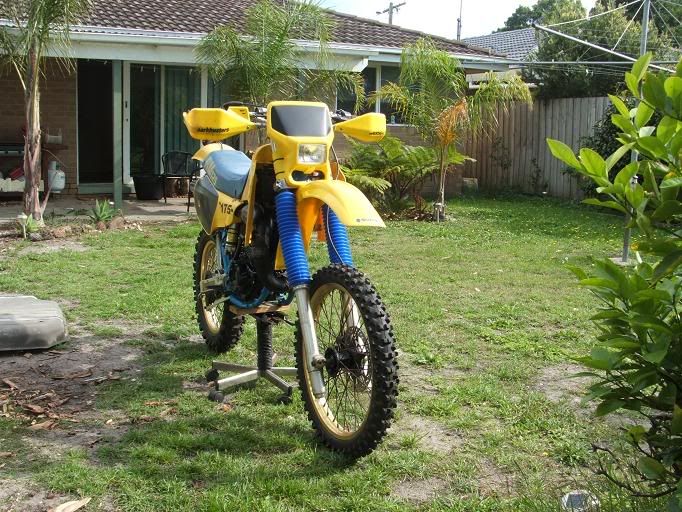
The new fork boots were also fitted to bling it up a little.Tyre and tube from the trusty PE175 (poor thing must feel like a prisoner that keeps dropping his soap in the shower)....not that i know what its like ;D


A set of Barkbusters arrived and were also fitted,i had to extend the right side bracket a little to clear the master cylinder fitting.I was worried if the bike was dropped,the clamp would snap the end of the m/cylinder fitting.


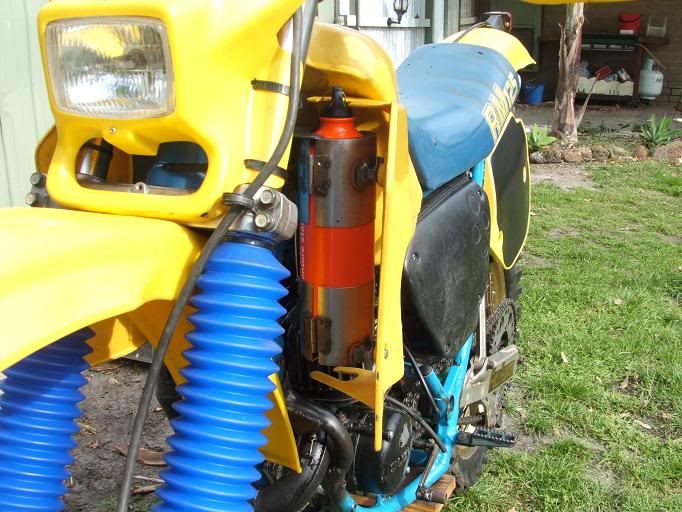
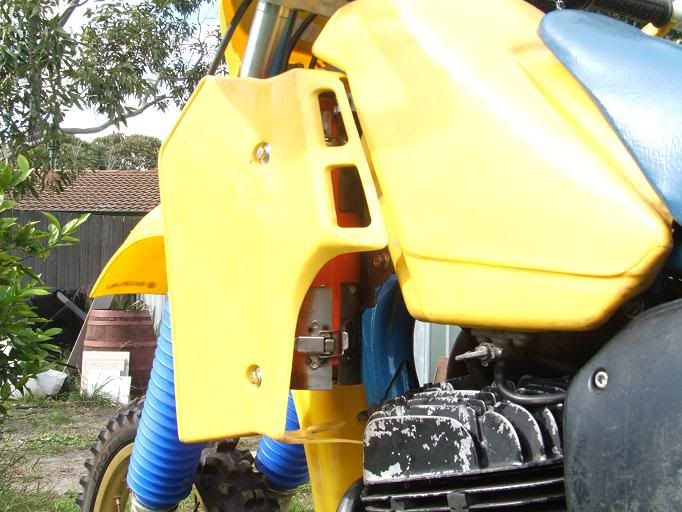
Next on the list was the left side shroud and what to put in the empty space  ??? ???
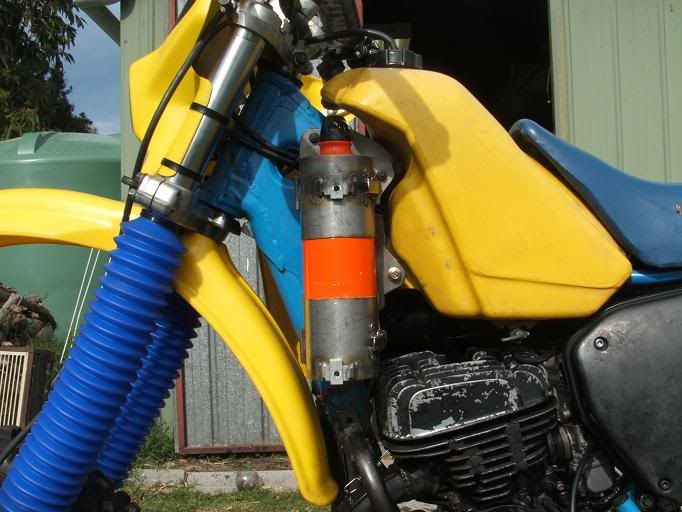
I had this stainless steel flexi cat/converter holder sitting around that fitted in the space available.
I also had my trusty Anaconda aluminium 1lt drink bottle that sat in the holder nicely  ;D


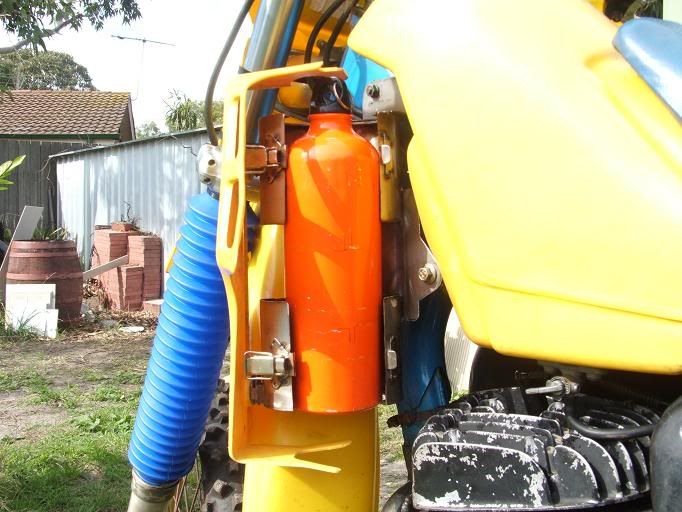
Welded up a couple of brackets to the rubber dampened fittings on the RM frame and brackets to the holder for the shroud to bolt up to.

All fitted up,the shroud sits in place nicely.If i use a long screwdriver to unclip the locks,the whole shroud swings open.


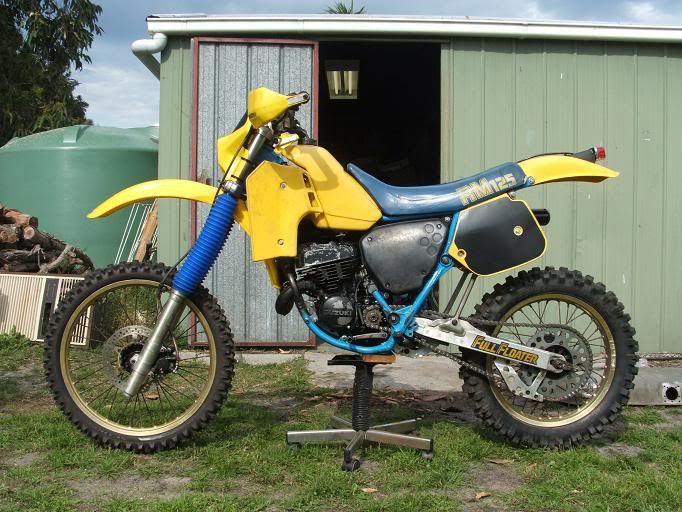
The real test will be out in the bush to find out how sturdy everthing is.If it all falls apart and is a pain in the butt,I'll end up fitting the PE tank and seat combo to give the extra fuel and less hassles.
Still have the little odds and ends to finish it off,but its almost there!
till next time  ;)
« Last Edit: April 19, 2010, 12:23:42 pm by monaro308 »