Author Topic: Semi-budget vinduro basher, 10/'81 IT250J  (Read 14774 times)

0 Members and 1 Guest are viewing this topic.

Offline G54B

  • Novice
  • *
  • Posts: 38
    • View Profile
Semi-budget vinduro basher, 10/'81 IT250J
« on: June 05, 2015, 02:40:03 am »
I bought this thing in Oct. 2013 for the princely sum of $700; it wasn't much to look at, but it had good bones. It turned over freely, selected all six gears nicely and the shock had damping, all the parts that weren't on it were with it with the exception of the lights and silencer insert, so I bought it. It needed crank seals, a base gasket and new fork seals, among other things.


New fork seals, new base gasket, a bit of air in the tyres and some assembly later, and we had a runner.


Did the crank seals, patched up a split that showed up in the tank etc.


Took it to Cookardinia, had a blast despite the five fouled plugs, one dead plug cap, blown fork seals and epic 1hr wrestle-a-thon involved in changing the rear tyre.


Did the top end and threw a new front tyre on it


Threw an original headlight shroud, complete with bog tin lid glued in the hole, and a set of handguards I pinched off my brother's XR600 on it, swapped the upper triple and forks for YZ125K ones and took it to the YamahaIT forum ride in November


Bought and fitted another tank


Ditched the bog tin lid for an actual headlight, an old 12v/11w foglight that came in a box of truck parts my uncle saved from the skip at his work. Also fitted an ugly gooseneck taillight off my brother's XR600; it didn't stay long though, it's got an MCS XR4 one on it now.


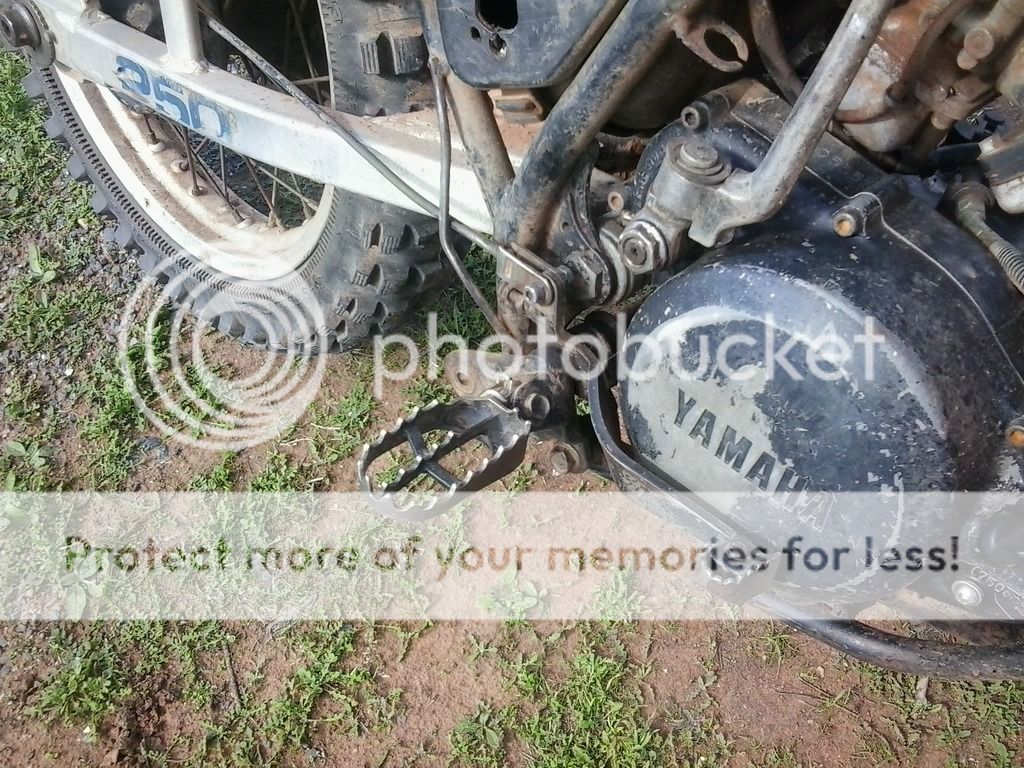
My brother fitted Pivot Pegz to his WR426F, so I got the OEM ones. 20 minutes on the bench grinder and I have decent pegs

I was given an IT-J rear brakeplate with the brake cam sleeve pulled out of it a while back, I was over the YZ465 brake's shenanigans so I decided to fix it up. Quick tap with the persuading stick to knock the sleeve loose of the crud on the brake cam, quick buff on the bench grinder, a bit of bearing retainer on the outside of the sleeve and press it back into the plate with the bench vise, and voila. One properly working rear brake. It actually stays adjusted, which is something the YZ465 brake never managed to do.


A few random pictures
Next to the DT175H I'm slowly doing up


I discovered quite by accident that if you hit this at the top of 4th it'll send you into orbit ;D ;D


This hurt. I was stuck under the bike for about 20 minutes until dad showed up to rescue me; the position I was in was super awkward, I couldn't get enough leverage to even move the bike, let alone lift it off me.


I think so far it's cost me roughly $1k on top of the purchase price. Good cheap fun in my books ;D
« Last Edit: June 05, 2015, 02:53:04 am by G54B »

Offline G54B

  • Novice
  • *
  • Posts: 38
    • View Profile
Re: Semi-budget vinduro basher, 10/'81 IT250J
« Reply #1 on: June 05, 2015, 02:40:37 am »
A few photos of the DT. It's not much at the moment, but I'm aiming to have it mostly together by Christmas. I have most of what I need, I'm missing a carb, airbox, seat, rear guard and top end off the top of my head. I'm probably not going to use this frame either, it's in good shape aside from the missing rear loop, and I do have another frame I could flog the loop off, but I can't weld to save myself. I still haven't decided whether it's getting a 125 or 175 motor; I love 125s, even DTs, but I can't help but think that a 175 would have a slightly easier time of hauling my weighty arse about ;D ;D
Plan is for a playbike, basically. Autolube, aftermarket muffler, trials tyres, short gearing etc. Something to get out and putt around on, climb stuff, pull wheelies etc. 


Offline Berwick Boy

  • B-Grade
  • ***
  • Posts: 164
    • View Profile
Re: Semi-budget vinduro basher, 10/'81 IT250J
« Reply #2 on: June 05, 2015, 11:03:42 am »
Great sequence of photos!  I love the 14th one down (top of 4th gear/orbit).  Check that fat ol' ant-hole.
She's a much-used workhorse.  Good on you  :)

Offline Tex

  • Legend
  • *****
  • Posts: 1358
    • View Profile
Re: Semi-budget vinduro basher, 10/'81 IT250J
« Reply #3 on: June 05, 2015, 11:15:18 am »
Great illustrated story about a well used old dirt bike. You're certainly getting plenty of bang for your buck!

Tex

Offline Broad-Arrow

  • C-Grade
  • **
  • Posts: 78
    • View Profile
Re: Semi-budget vinduro basher, 10/'81 IT250J
« Reply #4 on: June 05, 2015, 11:47:39 am »
Really enjoyed the photos and commentary - thanks for posting.  Vinduro at its best!  Who needs a $14K new bike to have fun!

Offline ghostrider

  • C-Grade
  • **
  • Posts: 120
    • View Profile
Re: Semi-budget vinduro basher, 10/'81 IT250J
« Reply #5 on: June 06, 2015, 07:57:00 pm »
  I agree with all the above comments , this is what its all about ,to take it out and play with it and have some fun , good on you mate , thanks for sharing your photos.

Offline Boyracer

  • C-Grade
  • **
  • Posts: 130
    • View Profile
Re: Semi-budget vinduro basher, 10/'81 IT250J
« Reply #6 on: June 08, 2015, 08:54:14 am »
Cool bike, new dirt bikes look shit compared to these.

Offline G54B

  • Novice
  • *
  • Posts: 38
    • View Profile
Re: Semi-budget vinduro basher, 10/'81 IT250J
« Reply #7 on: July 03, 2015, 09:40:13 pm »
Cheers fellas. She's definitely been the best impulse buy I've ever made, lol

My cousin and a couple of his mates came up for the June long weekend, we ended up spending all Sunday out on the bikes. We had a '15 KTM 250EXC-F, an '02 WR250F, a rough as guts '86 KLX250 and this thing between us.

The mighty IT stood up well, split pipe and intermittent lateral traction from the shitty Vee Rubber front tyre notwithstanding. I didn't fall more than 30sec behind the KTM at any point, and I was far, far quicker than the old KLX.... :D :D


My workboots ended up completely waterlogged after we found the mud, which is why I'm wearing Volleys in the second pic. Would have been wearing my MX boots, but they seem to have grown legs and run off, so the $70 laceups it was.

Anyway, ride days that good don't happen enough, so I'm calling it a win. Pretty sure I've bumped up this year's Cookardinia entry numbers by one, too ;D

RE: split pipe, I went to pop the front up over a log and didn't quite get it right. Got the front wheel over, but I gave it too much throttle, lost traction and smashed the bottom section of the pipe (the bit that runs across the front of the bike) on the log. The pipe split around the inside of the first bend in the header pipe.
So, I need a pipe before the next Canowindra vinduro in August. If anyone has a stock IT250H/J pipe laying around that they don't need... Doesn't need to be perfect, it can be a bit battered/rusty/whatever, provided it has no holes/splits in it and isn't bent. I'll consider a stock YZ250G/H pipe, too. Same deal.
Cheers fellas :)

Offline tony27

  • Legend
  • *****
  • Posts: 1908
    • View Profile
Re: Semi-budget vinduro basher, 10/'81 IT250J
« Reply #8 on: July 04, 2015, 05:56:42 am »
Have a look up musket mufflers here in NZ, they're likely to make a replacement front section

Offline 80-85 husky

  • Legend
  • *****
  • Posts: 3847
    • View Profile
Re: Semi-budget vinduro basher, 10/'81 IT250J
« Reply #9 on: July 04, 2015, 08:50:21 am »
how long would that 20 minutes have been with an arterial bleed or a broken thigh...don't you just luv riding bikes!

understand those early IT's have an inbuilt ejector seat if you hit a "big one"!! while Martin Baker called theirs an "ejector seat" Yamaha called theirs "Monoshock!"  ;D

bet that new kato don't look as new after that mallee mud bath.

great thread.

any number of bloke about who can repair that pipe if you cant get a nother one....

enjoy!

Offline alexbrown64

  • Legend
  • *****
  • Posts: 715
    • View Profile
Re: Semi-budget vinduro basher, 10/'81 IT250J
« Reply #10 on: July 04, 2015, 09:24:11 am »
That looks absolutely great fun and getting back to the spirit of what dirt biking is all about.
Musket mufflers makes a whole bottom section for the it250h/j.  Your pipe would be like new after welding it on.... http://musket.co.nz/wp-content/uploads/2013/12/YAMAHA.pdf

Cheers,
Alex

Offline kim80y

  • C-Grade
  • **
  • Posts: 142
    • View Profile
Re: Semi-budget vinduro basher, 10/'81 IT250J
« Reply #11 on: July 04, 2015, 05:28:03 pm »
Sweet!!!!!!

Looks  like a bargain full o fun, as stated, you don't have to spend a fortune, keep her reliable and ride the wheels of it, the H/J is great with no rear linkage to wear out!!!

Flamin awesome.

Cheers
Kim 8) 8)

Offline G54B

  • Novice
  • *
  • Posts: 38
    • View Profile
Re: Semi-budget vinduro basher, 10/'81 IT250J
« Reply #12 on: July 30, 2015, 07:07:26 pm »
I have a few things to get done before the next VTR ride at Canowindra
-Braze the split in the pipe header back together
-Check/repack the wheel bearings
-Change the damn kicker seal
-Pull the shock out and take it to get serviced (new oil/regas)
-Change the airbox over to the un-butchered one I have
-Change the gearbox and fork oil
-Clean the results of a dozen or so rides out of the air filter

Should get it cranked out this weekend, so I'll see y'all at Canowindra :)

Offline Ekka

  • Legend
  • *****
  • Posts: 675
  • Go hard or go home
    • View Profile
Re: Semi-budget vinduro basher, 10/'81 IT250J
« Reply #13 on: July 30, 2015, 07:30:23 pm »
Gez you have alot more work to do on the it then mine , got to wash the harrow mud off replace clutch ,new brakes , rear wheel bearing and the general check over  ;)

Offline G54B

  • Novice
  • *
  • Posts: 38
    • View Profile
Re: Semi-budget vinduro basher, 10/'81 IT250J
« Reply #14 on: August 02, 2015, 11:29:50 pm »
Started by pulling the exhaust off. I set my mate to scrubbing as much rust and crap off the split seam as possible, while he was doing that I pulled the tank, seat and sidecovers off and knocked the lower shock pin out. The pin came out heaps easier than expexted, I gave it a generous hit with the Inox through the little holes in the swingarm and lower shock eye before I did anything else, left it soak while I pulled the tank etc off, then got a little 2-jaw puller, hooked the arms over the lower shock eye, tightened it until it just started to pull the shock to the side and hit the end of the threaded shaft in the puller with a hammer until it moved. Tighten it up again, rinse and repeat until the pin end is flush with the swingarm, go dig up a drift with the same diameter as the pin and drive it all the way through.

You can see the little holes I was talking about in this pic.


Undid the shock and pulled it out; it has damping, and doesn't look too bad aside from some scuffing on the shock body under the helper spring and some dirt on the lower end of the damper shaft, so it was put aside and went back in the bike when I put it all back together. I'll get it serviced after Canowindra.


Replaced the airbox; for reference, where the knackered sticker is on this one was cut out on the old one. Excuse the bad picture, my phone doesn't have a flash.


If you squint you can see the incredibly ugly repair made to the split pipe. I can't weld with an oxy, so I got Dad to do it; it ain't pretty, but he did the best he could given how thin the pipe metal is in the header section. it should hold, if not, I have an exhaust bandage around here somewhere ;D


Gearbox oil and tyres is all that's left, ran out of daylight and I have to work tomorrow, so I decided to leave wrestling with tyres to the bike shop guys on Friday. Other than that it's good to go.