Author Topic: Sherpa T M92  (Read 17517 times)

0 Members and 1 Guest are viewing this topic.

Offline 80-85 husky

  • Legend
  • *****
  • Posts: 3847
    • View Profile
Re: Sherpa T M92
« Reply #15 on: October 30, 2016, 02:52:37 pm »
the motor should be good as gold bar the seals Serge, I don't think much ever goes wrong unless its been run unfiltered or no oiled. polish those cases.... 8)

Offline tony27

  • Legend
  • *****
  • Posts: 1908
    • View Profile
Re: Sherpa T M92
« Reply #16 on: October 30, 2016, 03:06:40 pm »
I think your extra mount looks good, only suggestion would be to swap the guards around at the new mount so that any mud/water follows down rather than over the lower guard & onto the front of the swingarm

Offline Short Stuff

  • C-Grade
  • **
  • Posts: 142
    • View Profile
Re: Sherpa T M92
« Reply #17 on: October 30, 2016, 03:48:19 pm »
I think your extra mount looks good, only suggestion would be to swap the guards around at the new mount so that any mud/water follows down rather than over the lower guard & onto the front of the swingarm

Yes, I thought of that tony27, but unfortunately the black guard (extension) is slightly narrower than the white guard and it just didnt sit right.

I haven't quite finished the mount yet, so a bead of silicone might be the go.

Thanks for your advise.

Offline Moto

  • A-Grade
  • ****
  • Posts: 326
    • View Profile
Re: Sherpa T M92
« Reply #18 on: October 30, 2016, 06:14:54 pm »
The plastic mudguards are a problem on these models.On the front guard I cut the plastic mudflap off.I found that when the forks are at full compression the flap would scrape on rocks etc(I think it actually split)cut it off neatly,no more problems.
On rear to extend the length,l had a broken piece of original guard,most originals are broken at the rear when the bike was flipped or thrown away.The lower part is usually undamaged.I cut it so it joins neatly to the plastic guard and still use the original lower mount.All polished up it looks great.You might get a piece at a swap or Peter S may have a piece from a wreck.
You are doing a great job with the bike.I am currently building a set of wheels for my Mk 12.Wheels are a big job and take a lot of time and patience.
« Last Edit: October 30, 2016, 06:17:32 pm by Moto »

Offline David Lahey

  • Legend
  • *****
  • Posts: 956
  • Gladstone, Queensland Australia
    • View Profile
Re: Sherpa T M92
« Reply #19 on: October 30, 2016, 09:22:14 pm »
Rear Gonellis are available in two lengths. The full length version is made to be the right length to reach from just above the swingarm pivot and provide just the right amount of overhang at the rear
previous pseudonym feetupfun

Offline Short Stuff

  • C-Grade
  • **
  • Posts: 142
    • View Profile
Re: Sherpa T M92
« Reply #20 on: December 26, 2016, 12:41:26 pm »
UPDATE: 

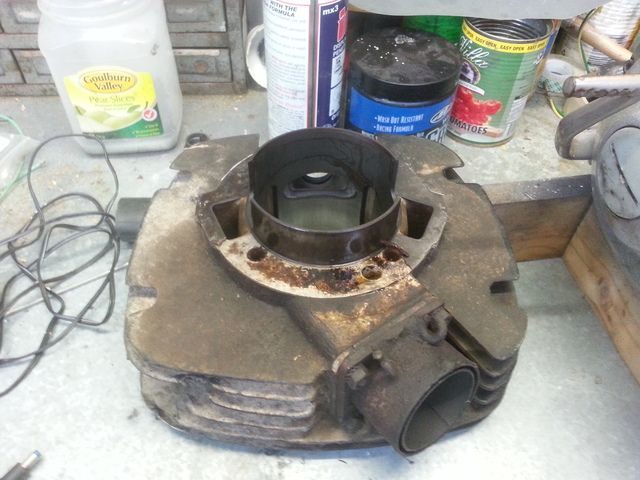
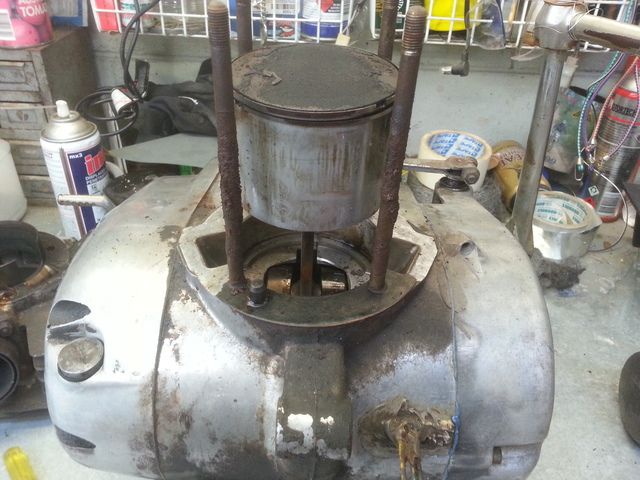
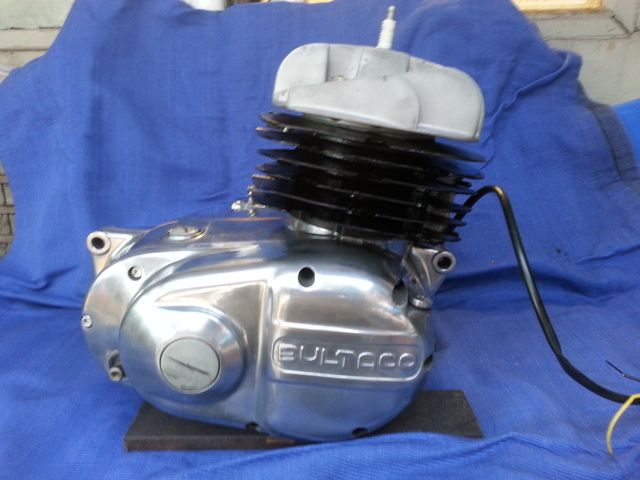
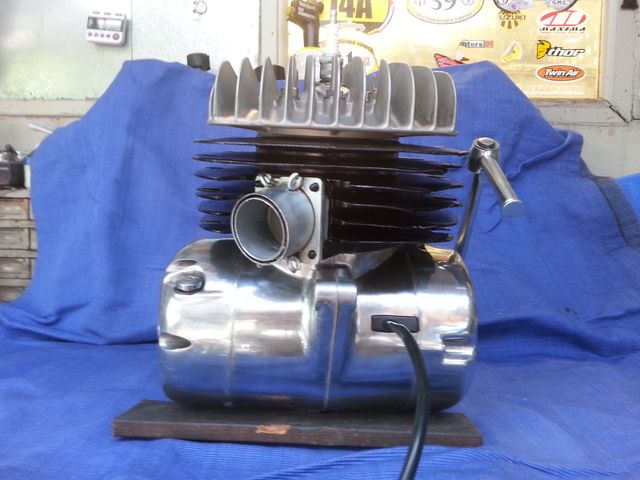
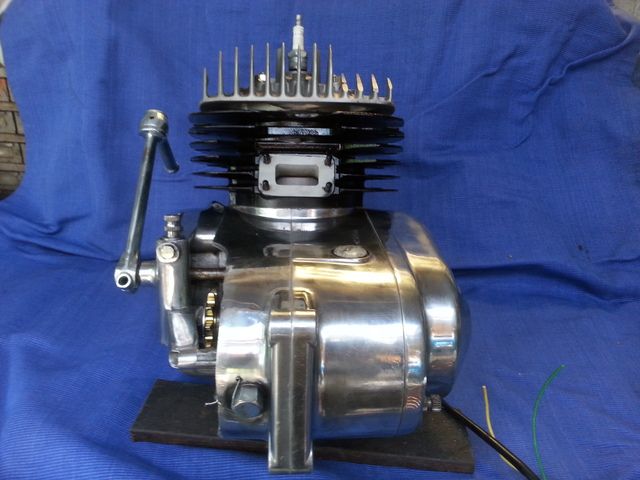
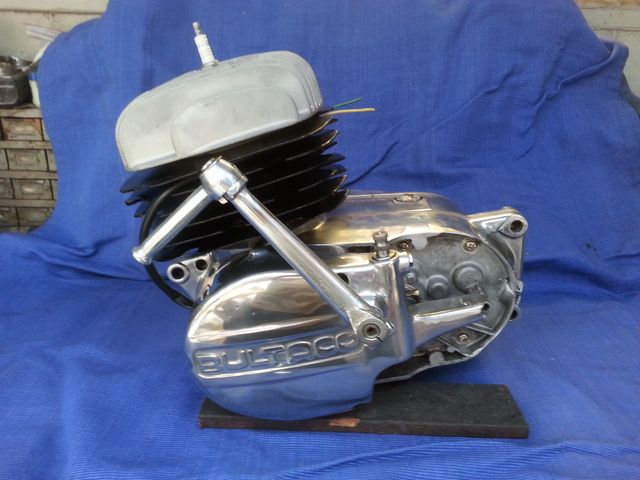
Given that the frame was now rolling, it was time to get the engine up on the bench and make a start on it. Despite (potentially) years of neglect, the power plant didn't look too bad.  A few bent and cracked fins and some minor scrapes and dents in the cases, but nothing to get too stressed over.
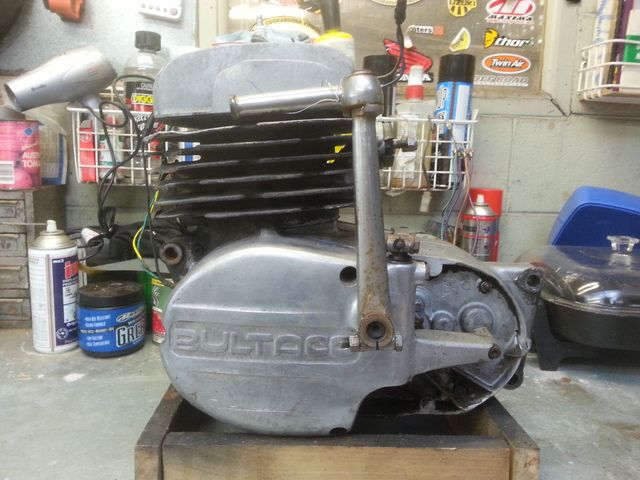
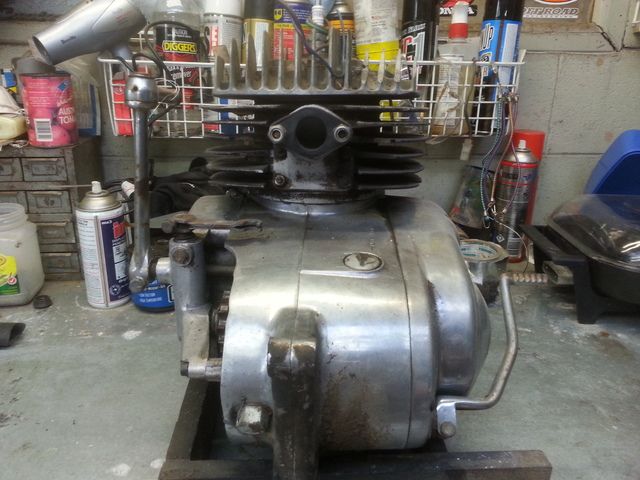
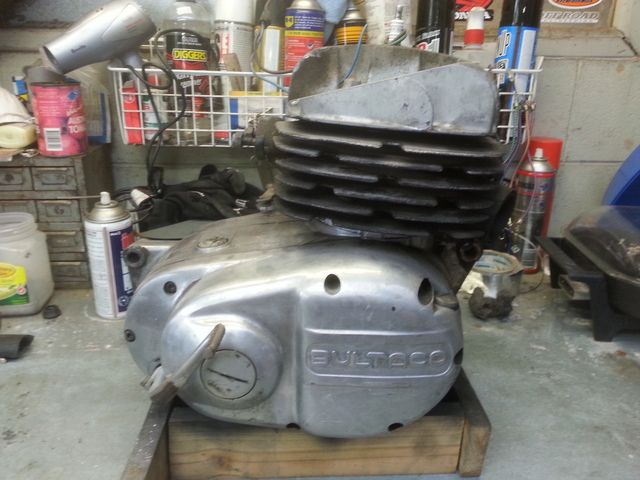
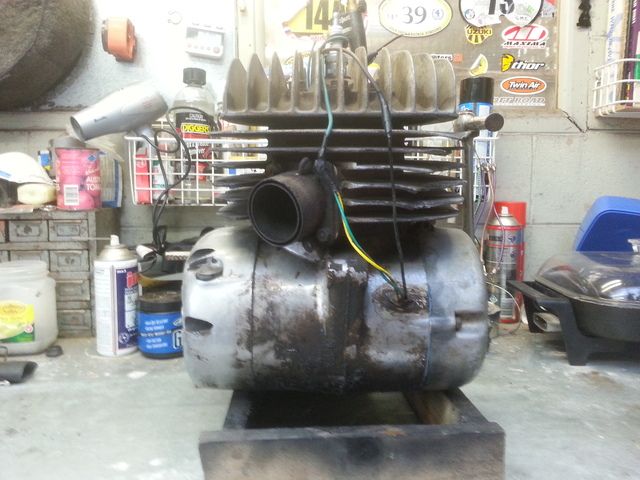


Before I pulled it out of the bike, I made sure it had spark (which it did), so theoretically when I put it all back together, it should still spark.  Happy with that knowledge, I tried to remove the sump plug, but it was stuck fast and the bolt head was pretty ratty.  No probs I thought, I'll disassemble from the top and flip it to drain the oil and get a better attack at the plug.  So I unbolted the head and that looked pretty good.  Slid the barrel off and despite a bit of water marking on the lower region of the bore, that too looked good.  Piston showed no signs of wear or gouging, so still happy with the progress.  Studs were looking a bit rusty, but a wire brushing would soon sort them out. 
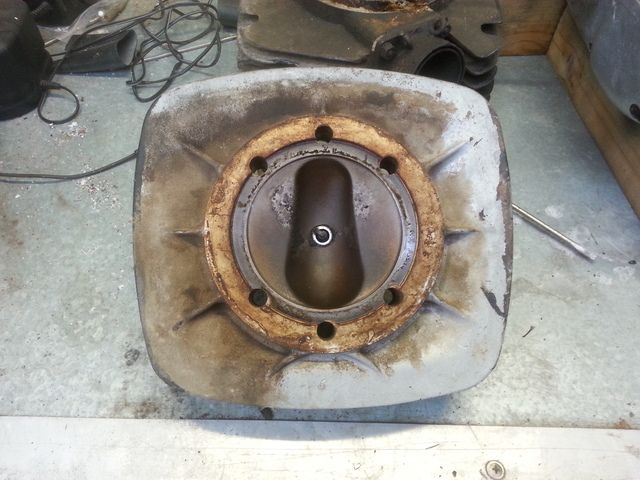


 OK, time to flip.......and my heart sank!  A 50 mm crack in the case revealed itself when I cleaned away the grunge festooning the bottom of the engine.
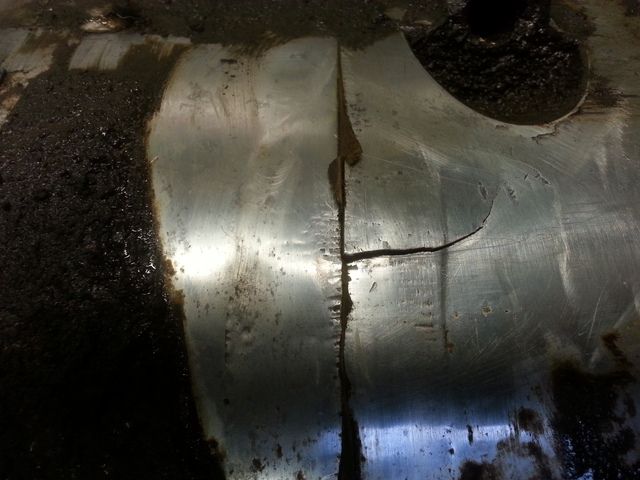


Panicking, I sent a photo to Paul (Ridewell Motorcycles), and asked if this was terminal.  His response was, "Nah, she'll be right!"  Buoyed by this, I continued on my merry way and pulled it down to present it to him for welding.

Obviously, to repair this crack, it was necessary to split the cases, which meant the Sherpa was getting new crank and gear-box bearings (regardless of wether it needed them or not).  So when the repair was done, he gave me back the cases and side covers and they were duly polished and returned.  meanwhile, I took the stator to an auto-elect mate of mine and had some new wires soldered to the coils, as the originals were not only crispy and stiff, but had been butchered over the years. The stator was returned to Paul and along with a new gasket kit, the bottom end was rebuilt.

Closer inspection of top-end components revealed that all was in great shape, so a light hone was all that was needed (along with bead-blasting and painting) before that went together and completed the re-build.


Offline Short Stuff

  • C-Grade
  • **
  • Posts: 142
    • View Profile
Re: Sherpa T M92
« Reply #21 on: December 26, 2016, 12:42:14 pm »
And so now, with engine together, it was time to put it back in the frame and make it a MOTOR bike.

I was starting to believe the bike would be a fairly light machine, until I wrestled the noise maker in!  It feels as though the engine weighs about as much as the rest of the bike.  Nevertheless, in it went, but not before mounting the kick-starter (which had been re-plated, new pivot kit and rubber), gear lever (which got the same treatment) and exhaust manifold (which was also re-plated).


Melbourne's hot weather (and Christmas) has limited my shed time, but I managed to get an hour or two to bolt on some more bits.  Muffler was blasted and re-painted, header pipe was polished and all put together with new springs and coupling.  Clutch arm was re-plated and installed with new cable and return spring etc.  Terminal block was polished and mounted with fresh hardware, along with the coil and checked for spark (which it has, phew!)  I'm not over-happy with the way the wiring is currently sitting, but I'll re-visit this on a cooler day.

So all-in-all, I'm pretty happy with the progress thus far.  Next job is to give the carbie and overhaul and mount that.  Then with throttle and air box pipe in place, we should be ready to kick her over!


Offline Short Stuff

  • C-Grade
  • **
  • Posts: 142
    • View Profile
Re: Sherpa T M92
« Reply #22 on: December 26, 2016, 12:43:15 pm »


Offline 80-85 husky

  • Legend
  • *****
  • Posts: 3847
    • View Profile
Re: Sherpa T M92
« Reply #23 on: December 26, 2016, 01:46:04 pm »
nice work, she looks great. have you got the second banana muffler?

you may need to scrape the connections to get a good earth. you wont know till you try to fire her up. if its missing and farting, it may be a poor earth.

also beware of the reverse running feature, make sure the 5000 year old ming vase isn't behind the bike when you go to ride it....


Offline David Lahey

  • Legend
  • *****
  • Posts: 956
  • Gladstone, Queensland Australia
    • View Profile
Re: Sherpa T M92
« Reply #24 on: December 26, 2016, 04:03:27 pm »
Looks very nice.
For next time, the motor is a lot lighter without the flywheels and cylinder in place. I always do the final assembly with the motor in the frame. Bultaco motors in general are quite a light motor for the era, with the exception of 325cc Bultaco trials motors with their huge flywheels. 
previous pseudonym feetupfun

Offline Short Stuff

  • C-Grade
  • **
  • Posts: 142
    • View Profile
Re: Sherpa T M92
« Reply #25 on: February 12, 2017, 05:08:27 pm »
THE MISSING LINK:

The final piece of the engine puzzle (the carby), has finally been sorted!


It looks like the slide may have been dropped at some stage, as there was a fine 'ridge' on the bottom egde which was catching inside the bore of the carb and causing it to bind.  So Paul plished it out with a bit of fine wet n' dry, untill the the side slid happily all the way up and down.  I finished giving it a good clean, then bolted it onto the manifold (with new gaskets and hardware), hooked on the new airbox-carby tube, oiled up and inserted a new air filter, hooked up and plumbed a new throttle cable and slipped on some new grips.

I then gave the bike back to Paul and got him to check timing and points gap, and check all the carbie settings, then........

https://youtu.be/DcM1A1lAYkU

Offline Short Stuff

  • C-Grade
  • **
  • Posts: 142
    • View Profile
Re: Sherpa T M92
« Reply #26 on: March 10, 2017, 08:02:37 pm »
Ooohh!!


Offline 80-85 husky

  • Legend
  • *****
  • Posts: 3847
    • View Profile
Re: Sherpa T M92
« Reply #27 on: March 10, 2017, 09:23:33 pm »
ohhhyeeaaahh, got to love that sherpa style

Offline bigthumpa

  • C-Grade
  • **
  • Posts: 142
    • View Profile
Re: Sherpa T M92
« Reply #28 on: March 10, 2017, 10:01:45 pm »
Very nice job! I have still got my Dad's model 92 in the shed, bought new in 1973 from Lloyd Chapman Motorcycles. Still run great although completely unrestored.

Offline Short Stuff

  • C-Grade
  • **
  • Posts: 142
    • View Profile
Re: Sherpa T M92
« Reply #29 on: March 10, 2017, 10:27:40 pm »
Very nice job! I have still got my Dad's model 92 in the shed, bought new in 1973 from Lloyd Chapman Motorcycles. Still run great although completely unrestored.

I'd like to see that.  ;)