Show Posts

This section allows you to view all posts made by this member. Note that you can only see posts made in areas you currently have access to.


Topics - Short Stuff

Pages: [1] 2
1
General Discussion / Carbie Identification
« on: July 28, 2020, 01:34:26 pm »

Can anyone ID this carb?

And is it worth anything (to anyone)?

No visible markings other then "Minuni Corporation" on one side and "Japan" on the other.

Cheers.


2
General Discussion / Aussie Mufflers
« on: March 29, 2019, 04:43:39 pm »
Does anyone know anything about the origin of 'Aussie Mufflers'

This came on a DR200 I bought.


3
General Discussion / AMTRA High Country Ride CANCELLED!
« on: March 17, 2019, 04:33:45 pm »

Just a heads up for anyone here that was booked in for the AMTRA HCR, the event has been cancelled due to Bush fires in the area.

All entrants will be contacted.

Visit amtra.com.au for further information.

4
Suzuki / DR 200 Mud Flap
« on: January 28, 2019, 05:37:15 pm »
Does anyone have one of these mounted to their DR 200?


Part # 25

Could you please post a pic of how it mounts?

Thanks.


5
Wanted / Suzuki DR 200 Bash Plate
« on: January 19, 2019, 10:38:47 pm »

Probably a longshot, but looking for a bash plate for a 86 - 94 DR 200.

Any assistance greatly appreciated.

6
Tech Talk / Wheel Identification
« on: October 29, 2018, 01:00:23 pm »

Can anyone shed some light on this logo?


I'm trying to identify a wheel that was mounted to a doner bike I acquired.

This logo appears on the brake drum, along with the numbers 764

It appears on the hub, along with the numbers 773

And it appears on the brake plate along with the numbers 765

The rim is Gold and is stamped Takasago J 17 x 2.15 DOT 171 Japan 982

I just want to know so I can advertise the wheel for sale, with some confidence that I know what it came off!

If it's of any use to anyone, please feel free to PM me.

7
Wanted / Suzuki DR 200 Bits
« on: October 27, 2018, 07:21:10 pm »

Looking for an assortment of DR 200 parts (1986 - 1995).

In particular, headlight, tail light, speedo/dash and bash plate.

May be other parts too, but I'll know when I get further into the build.

Thanks in advance.

8
Wanted / Suzuki PE250N Clutch Cover
« on: July 17, 2018, 04:03:59 pm »
Urgently in need of a clutch cover for a '79 PE250 (Harrow is only a week away!)

Any assistance or leads greatly appreciated!


9
Suzuki / DR 200 Carby
« on: June 13, 2018, 05:40:44 pm »
Looking for a car by to suit a 88/89 DR 200.

Any assistance greatly appreciated.

10
Wanted / DR 200 Carby
« on: June 13, 2018, 05:38:59 pm »
Looking for a carb to suit 88/89 DR 200.

Any assistance appreciated.

11
Spaniards (Bultaco, Ossa, Montesa etc) / Sherpa Kick-start Question
« on: February 19, 2017, 02:06:33 pm »
Now that I have my resto to the point of being able to start it, I'm having issues with the kicker itself.

In 'resting' position, the starter sits like this (based on picures I've seen):


Starting the kick sees the lever vertical from this position, and when I kick through, the lever hits the brake pedal:


Following through the kick and the lever pushes the brake pedal towards the crank case and ends up underneath it and un-able to return:


This doesn't seem right!  Can anyone please point out what I am doing wrong?  Or is this what I should expect?

Thanks.

12
Spaniards (Bultaco, Ossa, Montesa etc) / Sherpa Seat Base
« on: December 14, 2016, 05:29:25 pm »
Looking for a sevicable seat base for my M#92.

Any assistance greatly appreciated.

13
Wanted / Sherpa Seat Base
« on: December 14, 2016, 05:27:44 pm »
Looking for a serviceable seat base for a model #92 Sherpa T.

Any assistance greatly appreciated.

14
Spaniards (Bultaco, Ossa, Montesa etc) / Sherpa Wiring
« on: December 11, 2016, 03:43:42 pm »
I need some guidance with my M92 wiring.

My Sherpa doesn't run lights, and when I got it, it had spark.

Coming out of the mag cover, there are 3 wires (black, green and yellow)


The yellow and green wires are solded together and have been (in turn) soldered to a piece of blue wire which runs up to the terminal block.  This then connects to an (earthing?) wire on the coil.


The black wire is soldered to a piece of brown wire which runs up to the terminal block and connects to the coil.  It also has a piece of blue wire connected to it which loops up to a kill switch on the handle bars.


Does all this sound correct?  Ive had fresh black, yellow and green wires soldered onto the stator and would appreciate confirmation as to where they are supposed to go and what they are supposed to do.  Pics would be great (sorry mine are so crap!)

Cheers.

15
Spaniards (Bultaco, Ossa, Montesa etc) / Sherpa T M92
« on: September 26, 2016, 12:38:20 pm »

A long time ago (when we had paper money, shops shut at midday om Saturdays and I had black hair), I used to knock around with a guy named Justin. Justin used to compete in club trials on a Montessa Cota 172, and I used to follow him around on his dad's Sherpa T 350.  I enjoyed that bike cos' the seat was so low that I could touch the ground with ease (I was short back then too!)  Those bikes were so quiet, that we would walk them down to the cutting under Mont Albert Road (part of the old Kew railway) and ride for hours without alerting the attention of anyone.

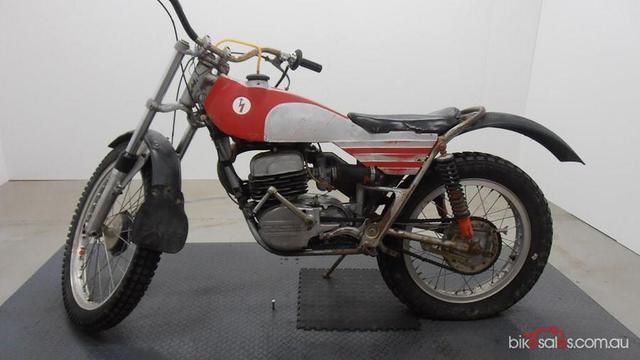
I caught up with Justin at the 2015 AMTRA HCR, I asked about the Sherpa and he advise that it was lost in a fire some years ago.  When I got the resto bug, I always thought that, one day, I'd try and do one on a Sherpa.  Well, that day has come.  She's not pretty, but a good base to start with.


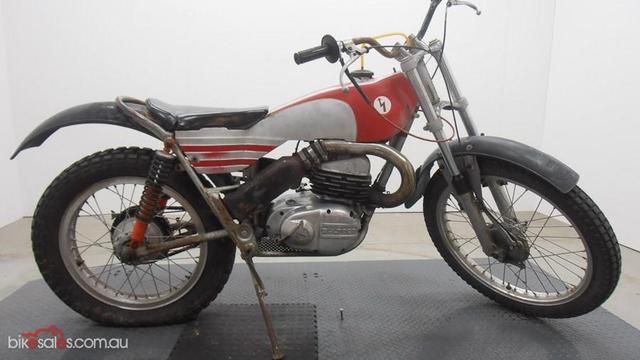
I started pulling it down a month (or so) ago, and with so few parts, pulling the Taco down was a relatively simple and quick job.


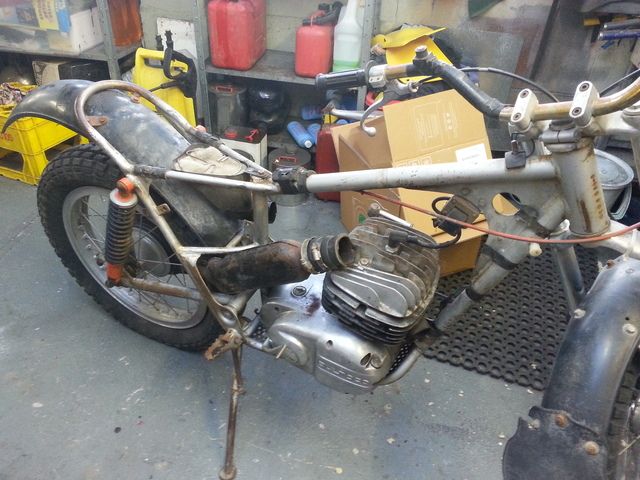
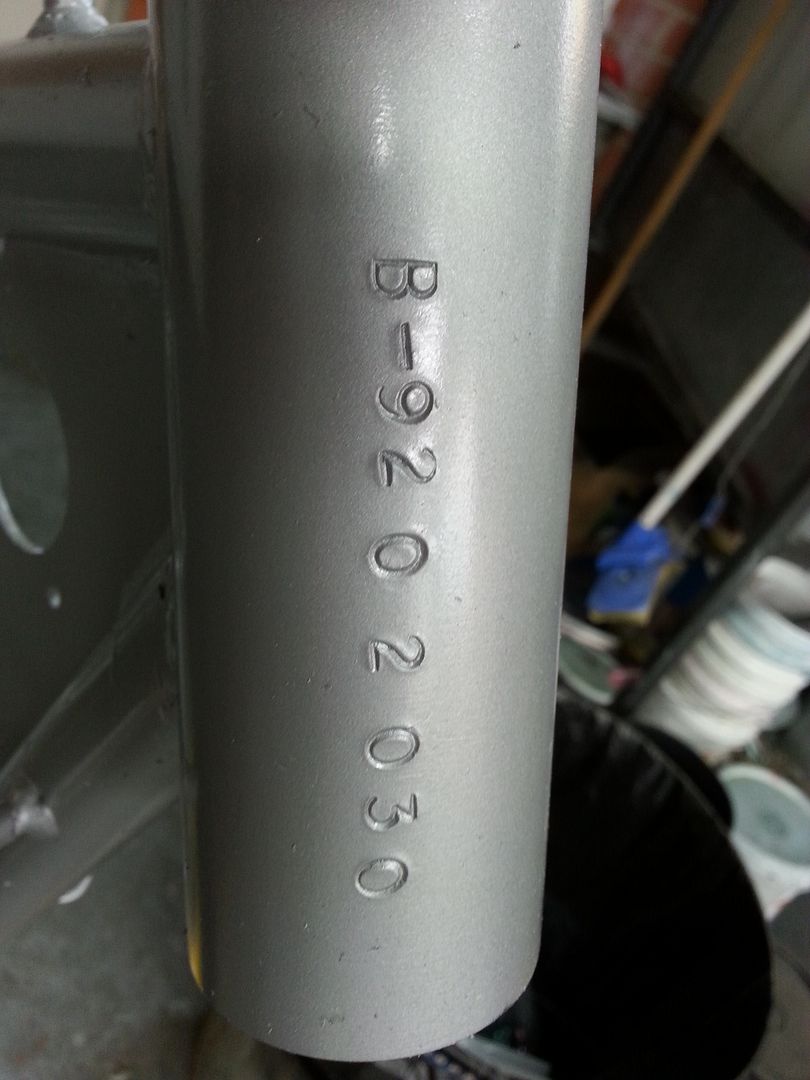
The only real problem that I encountered so far, was that the swing-arm axle and bushes had become one and were corroded together, which required cutting through the axle to remove.  But aside from that, I was pleased to see so many original Bultaco bolts still in place and in good condition, along with so many other parts in an un-molested state!

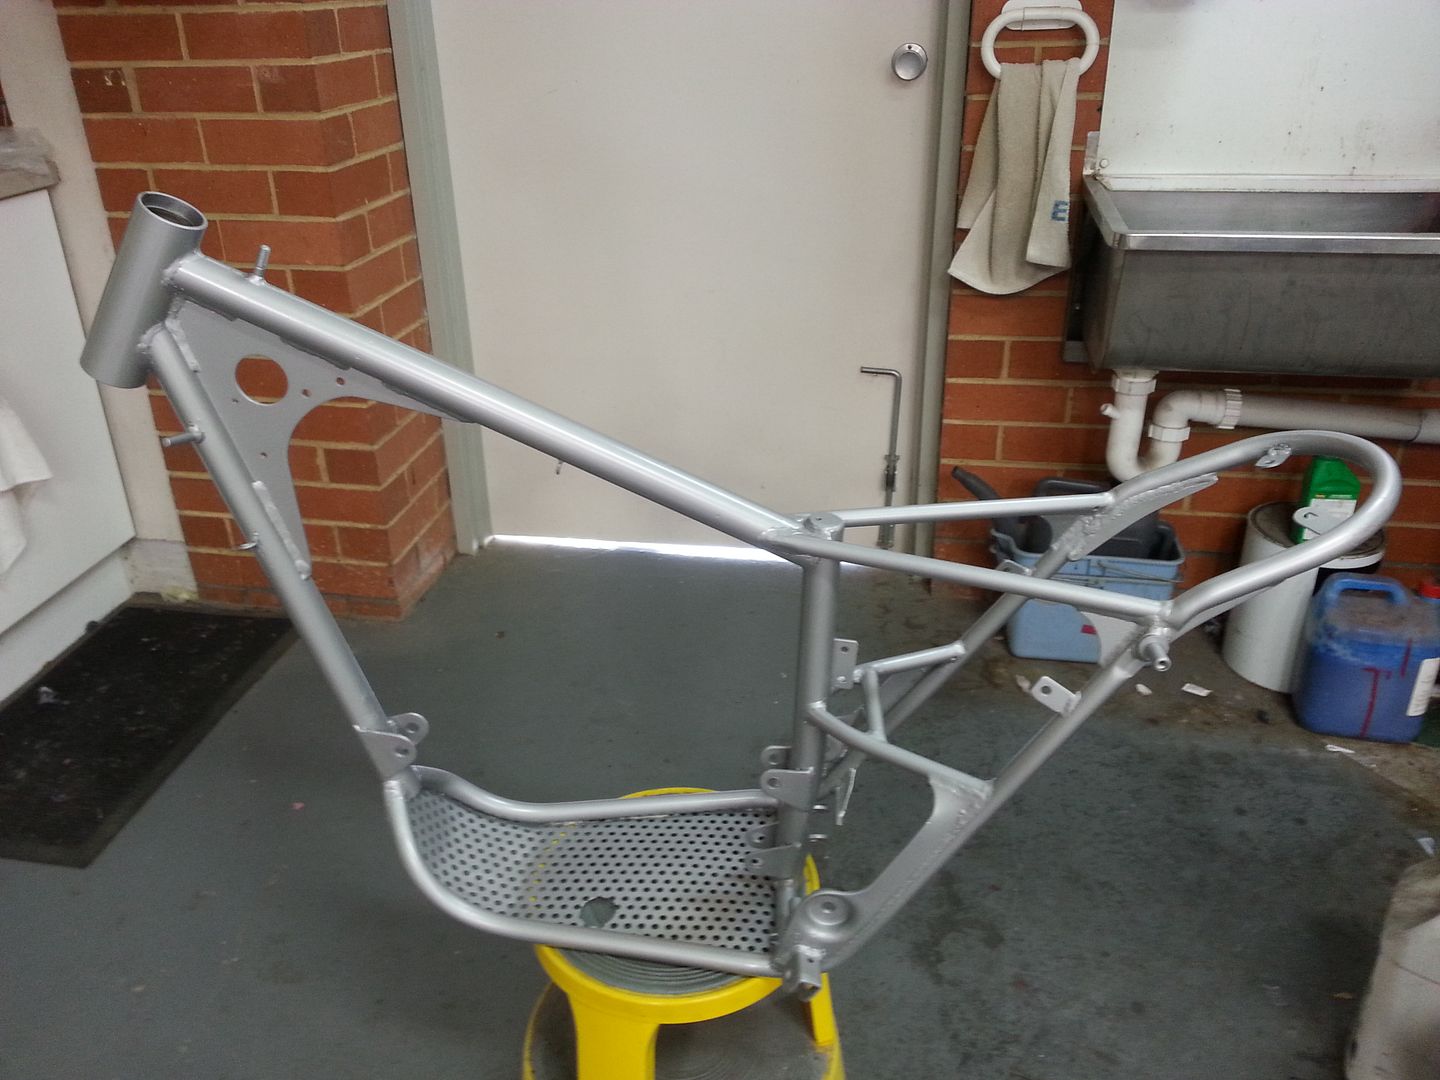
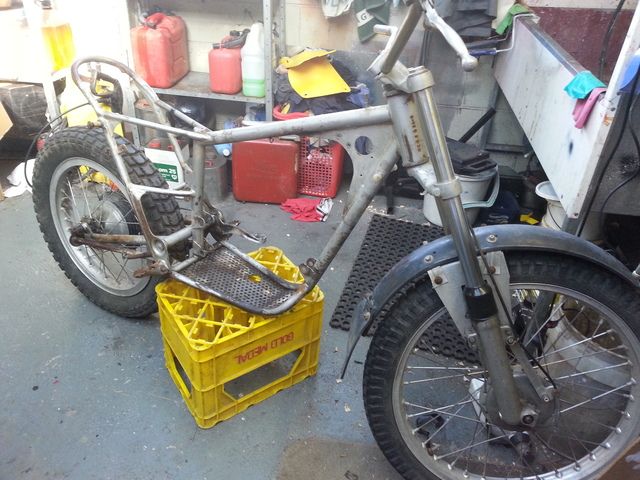
With the frame and swing-arm in two separate pieces, I set off to get them sandblasted and officially start the re-build.

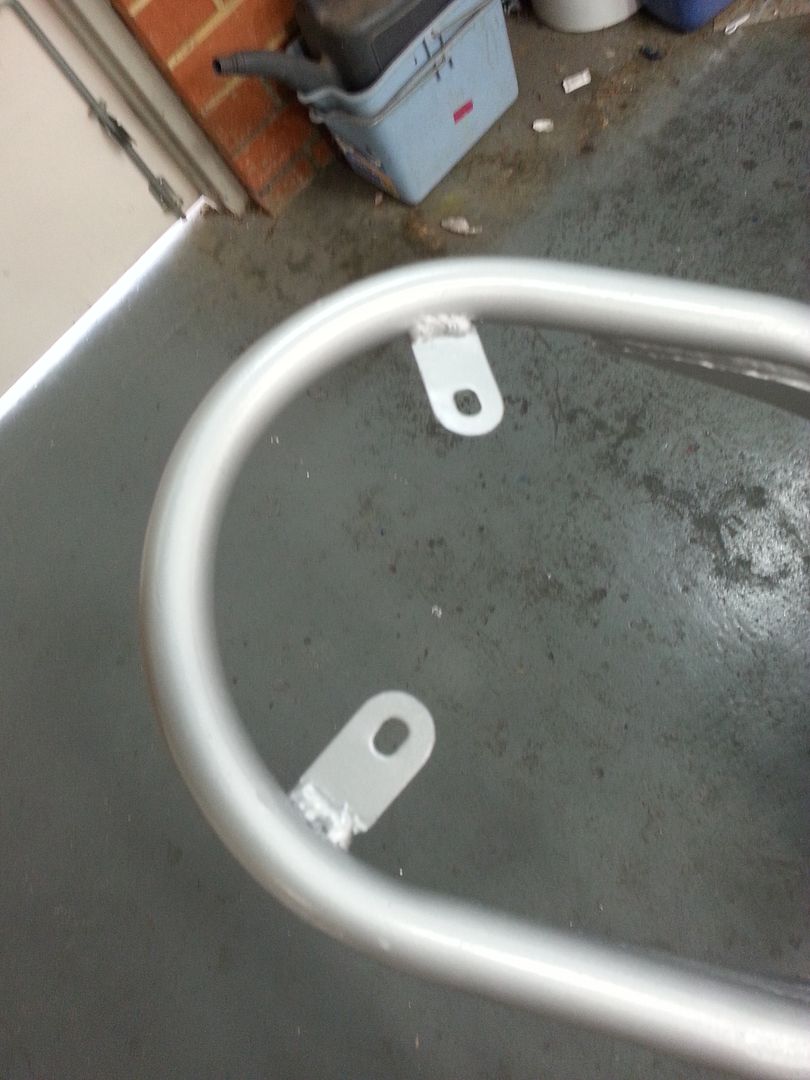
2 coats of primer, 2 top-coats and a clear coat (along with a small repair) and the frame was goo to go.


Pages: [1] 2