Show Posts

This section allows you to view all posts made by this member. Note that you can only see posts made in areas you currently have access to.


Messages - baitfish

Pages: [1]
1
Yamaha / Re: 125 G-Banger Project
« on: August 08, 2018, 08:26:59 pm »
quick update,

g-banger lives! i've had it running and even managed to take it for a lap around the yard. nothing could wipe the smile off my face at the time!
I did have a problem with the kick stater not springing back properly, i had to pull the clutch off and inspect the kick starter gear. I found the  spring
clip that goes on the back of the kick starter gear had come off and was bent and damaged. Tried my had and blacksmithing and got clip round around and on the right angle. Put it all back together and it worked perfectly, still going to source a new spring clip regardless.

couple of progress pics


nos tank mounts


DIY chain slider with reema rubber to get me going


got a bit carried away with the fuel tap polishing


more parts mounted, nearly ready to start.

I've just finished building a muffler for it, i'll get some photos up soon of it.

2
Yamaha / Re: YZ125G stator winding resistance.
« on: August 08, 2018, 08:10:25 pm »
Hi Woody,

thanks for confirming that with the bulletin, it still blows me out that three different manuals i had access to all had the wrong values.

cheers

3
Yamaha / Re: YZ125G stator winding resistance.
« on: July 17, 2018, 09:30:18 am »
So a bit of an update, I've had been able to get someone to test a coil on a running YZ125H, as far as i can tell by part numbers and the
manuals, the G and H use the same coils.

The running engine measured at roughly 280 ohms,

The second hand coil I brought, that supposedly came from a running bike when wrecked, tested at roughly 280 ohms,

The NOS item I got from the states, still in its packaging, measured at roughly 280 ohms,

The coil that came with the bike measured at roughly 280 ohms

So from this i'm thinking that the G and H both run 270 ohms high speed coils + or - 10%, not 470 ohms like the manual states???????

I put my stator back together, mounted it in the bike and gave it a few test kicks with the plug out. Looks to be a nice strong blue spark.

So hopefully that is that and i can continue on with the build. That was a few hundred dollars and few months of running around chasing information
and parts for no reason it seems.

4
Yamaha / Re: 125 G-Banger Project
« on: July 02, 2018, 11:40:18 am »
Hi Overthehill,

thanks for the heads up on the rear brake, I'll have a closer look at that just to make sure it is all fine. I had a pretty good inspection of the frame when I
sand blasted it, everything appeared straight with no signs of kinks or creases. I'm not overly familiar with dirt bikes so it is possible that i may have missed something. The rear guard is off who knows what, the mounting holes don't line up with anything and the previous owner has drilled new mounting holes in the guard to mount it, the guard is actually deformed a tad to make it fit. I assume that is what is giving it that funny look, will change the guard out with
a repo one in the future some time.

5
Yamaha / Re: 125 G-Banger Project
« on: June 28, 2018, 12:06:41 pm »
I recovered the seat using an eBay special cover, turned out alright. The foam was in okay condition, some spots had rotted out a tad so filled them
with some random foam I had in the shed. These are visible with cover on, as you can see it’s a bit bumpy and rough looking in the area, detracts from
finish of the cover.

I also started having a crack at the fuel tank, trying to make it look less like brown and more white. I started with the normal scrapping method, which just revealed that the stains had come from the inside out, so I started sanding the tank all over to try to smooth the scrap marks. This has been a job that I do
a little bit on then come back to later. At one stage I tried the bleaching method using oxy action and hydrogen peroxide, which I think helped but that
could all be just in my head. The link below is one of the sites I looked at for this method, I also found a retro gaming forum using a similar method
to clean up old computer plastic.  w w w . dirtbikeworld.net /forum/showthread.php?t=121948 


I found a second-hand side plastic on eBay for cheap but it needed several layers of paint removed to get it back to white, I took the gamble and
used paint stripper on it hoping the plastic would handle it. The plastic did well, but the gloves I was wearing didn’t handle the stripper so well and it
seeped through the gloves leaving me with some rather sore hands. Note to self an old box of disposable nitrile gloves doesn’t cut the mustard when using
paint stripper. I've upgraded to a thick pair of chemical rated gloves now. I gave the plastic a good sanding and now it needs a good polish to finish it off.


In those photos you can see some of my silver parts turning yellow. damn cheap clear! Also, the carb and intake boot that I brought from Budapest
eBay is mounted just to see if it all fits. At this point I still had the black swing arm and black side plastic. I had also mounted the front and back guards, pegs, stand and some fork protectors direct from China. They didn't come with any clamps, so I used some stainless-steel cable ties I had in my collection
and they turned out pretty well. I ended up with a red chain guide as it was an auction item and I picked it up at around half the going price of a black
chain guide. Still need to get myself a chain slide, going to stick with red so those two items at least match.

I used an All Ball head stem bearing kit to reinstall the head stem. I mucked around for hours trying to get the old bearing races out. I got one out rather quickly and the other was being a pain in the dot, I was being stubborn and refused to get the welder out. I walked away and came back the next day,
dragged the mig out and two seconds of welding a run along the inside of the race and it pretty well just fell out. Being stubborn gets me no where
fast.


polished swing arm and white side plastic, still needs polishing. every time I touch it at the moment it leaves a dirty mark. The bike is sitting on
a homemade bike stand, I was too tight to buy one and I had access to all the materials I need to make it. The timber underneath is to make
it a tad higher. I've since cut that timber to size and screwed it to the top of the bike stand.

I brought a front and rear sprocket, primary drive lock nut, locking tab, chain, and a few other odds and ends of wemoto.com.au. It took a fair while for it
to come as I got a few little oem parts, but it was worth that wait as they threw in a sun buff (I love these things for fishing!), key chain, stickers
and something else I can’t remember at the moment. Only worth a few bucks I guess but I thought it was pretty cool of them to do that.


I haven't got many photos from this stage, but installed the engine with no cylinder or piston, I also installed the sprockets and chain. I fabbed
up a bit of a mad max style chain guide one day as I was inspired by some random cafe racer Facebook page stalking. I also polished the engine mounts before they went on as well, probably the shiniest thing on the bike.

I contacted the local bike shop to price up a piston and re-bore to suit. The re-bore was quoted at $150, the piston was going to be like $300+. So, I told
them to leave that to me and got one delivered for around half the price. I dropped the cylinder in and piston and they sorted it out for me, I did ask them to clean it for me, as in hot parts washer or a soda blast and I’d pay the extra but that never happened. So, it got a whole lot of pressure washing and wire
wheel action, a couple of coats of high temp black and into the oven for a bake. The head was also cleaned up at this stage and painted high temp silver and baked as well. The whole lot then was assembled on the engine. I was missing some studs and nuts, so I purchased some from a bolt shop, but the Yamaha "special cylinder nut" was OEM only. I found a picture of some and decided to test out my lath skills, while the finish wasn’t pretty, it did the job perfectly! I forgot to get a picture of the finished product, maybe subconsciously on purpose!


In the above photo I've also got the throttle mounted which is off I think an XR, (brought from the refuse shop), generic perch and levers from the local bike shop, cables that came from a wrecked 125G and I polished up the handle bars that came with the bike

When I was putting the rear wheel back on, I was having all sorts of problems getting the spacers right, I figured I had some wrong parts or was missing
some. I ended up purchasing a "complete" rear axle to suite the G, but it was also missing the spacers. So, after much discussion with YZ250H and photo
swapping I turned up a spacer of my own to suit. I made a few at slightly different lengths just to be sure I would have one that fit.


6
Yamaha / Re: 125 G-Banger Project
« on: June 28, 2018, 08:47:11 am »
I managed to get the frame, swing arm, shock spring, pegs and a few other small parts sandblasted at the same time as I did the crank cases.
Defiantly glad that is not a job I have to do for a living, I was slowly and made a terrible mess, took me several attempts to get into all the nooks
and crannies. All the parts got primed with several coats, and then copped either black or sliver top coats.

Things didn’t go well after this, I used "quality" black spray paint which has held up fine, but the silver was just export brand from supercheap,
with export clear over the time of the silver. I thought that the clear would help the silver and give it a nice shine, wrong I was. The clear started
turning yellow after a few weeks. So, some parts have come off and been repainted in duplicolor high temp silver, other parts are still rocking the
"yellow silver" look. Note to self, don't cheap out on the clear or better yet don’t worry about the clear!

The shock was given a quick polish, and put back together with the painted spring. I had been informed that before I got carried away with putting anything back together, that the air-box needed to go in first. It just so happened that I was looking for an air filter cage when I stumbled across a 125H airbox with a cage. I had read that the H airbox was a bit better of a design and fitted the G, so I purchased it and waited for its arrival. It turns out what for parts really slows down a build! Once the box arrived I drilled out the rivets holding the boot to the air box, I painted the ring in silver and clear (my other parts had not yellowed yet) Then reassembled with blind rivets and lots of sealant around the boot, I had read that the G had been prone to dust being sucked in through this area and causing failures. 


I was missing the airbox lid and bracket that holds the lid on, so made an aluminium lid and a bracket from stainless steel. It took me two attempts
but I did manage to get a lid that was able to "click" onto the lid of the airbox. In the end YZ250H played Santa for me last year and gifted me a
airbox lid, best present that year!


Mk 2 air box lid with custom orange peel finish!


The swing arm didn't stay black for long. A bit of guidance and looking at a few photos I ended up stripping all the paint off and polishing the swing arm up
it turned out a lot better than I thought it would.


I brought an All Balls swing arm bearing and seal kit to reinstall the swing arm. The kit is "modernised” so it wasn’t a case of like for like and took a bit of trial and error until I got it all sitting nicely.
The forks got a reseal using an All Balls kit as well, the seals where like for like and a pretty easy install. The only trouble I had was removing the bolt that holds the spindle in place, the whole spindle was spinning with the bolt. My solution was to compress the fork while it was together with a tie down strap, this applied all the spring pressure onto the spindle and kind of held it down tight, I was then able undo the bolt. I was rather cautious when I was undoing the tie down strap just encase it all wanted to fly apart, had nothing to worry about in the end. The fork tubes got a rough polish while I had them apart. I also rigged up a fork level syringe to get the oil level in the tubes the same.


I found some more photos on my phone from the build,


this is the workshop that sorted my crank


that was the bearing retainer I forgot and had to split the case again to put in


all the internals out, to install one bearing retainer


I forgot about this, the only bolt that has stripped or snapped in the whole rebuild so far, happened to be a cylinder stud! Had to give it
a helicoil repair job.

7
Yamaha / Re: 125 G-Banger Project
« on: June 28, 2018, 06:51:47 am »
Great info there baitfish.  Looks like you certainly have your work cut out for you getting G-Banger going..
I have to split the cases on my G, but hopefully all is well, as a few months ago when i bought her, i got it running and took it for a test spin up the street.  Was lifting the front wheel through the gears... Absolute flyer.

Cheers,


Yeah lots of work, for as frustrating as some things have been its been an enjoyable project with a steep learning curve. You are already half way there with your project, it runs and well by the sounds of it! cant wait to give mine a squirt!

You've got a good canvas to work with and have made a great start baitfish. They're a great model. I found that clutch baskets and cranks were amongst the hard to find parts and was lucky enough to pick up a nos crank kit and i haven't seen another one come up since. All the best with the resto. I'm sure that you would have come across the YZ125G owners group on fb by now.

Woody,
that's an amazing looking G, looks like a lot of time, effort and money went into that build! I haven't actually come across the group on Facebook i will have a look today.  thanks for the heads up.

Woody or Alexbrown is there any chance you could test your stator  source coil for me? i'm clutching at straws and really want them to be 270ohm coils, as now I've got three of them and a NOS coil that doesn't test in spec compared with the manuals.

Cheers.

8
Yamaha / Re: 125 G-Banger Project
« on: June 27, 2018, 02:55:41 pm »
The cylinder got put to the side to await a rebore and a paint job. Next, I split the crank case as the big end bearing had play in it, and it
was a good opportunity to check out the internals. I had only ever split one case and that was on a Polaris 50cc quad, so I followed the steps
in the manual for the g-banger and everything came apart pretty well. The crank bearings did decide to stay on the crank but, so that required
a bearing puller that I did not have in my collection, luckily, I had access to a kit at work.


not a real nice-looking crank at all.


just reference photo I took, I think it was the other side I had to use the puller at work to remove.


I did have trouble getting the rotor off as well, YZ250H came to the rescue there, he was visiting up my way and brought the correct puller and
knowledge with him so that I didn't mushroom the end of the shaft and create more work. Pressure from the puller, plenty of Penetrene, small concentrated
hits of heat and patience was the required recipe. Took two days of going back and forth before the rotor finally let go, with no damage done do anything.
I didn't get any photos of this, two busy drinking beers at the time I reckon.

I continued to remove everything from the cases as I had come this far and figured I may as well put new bearings everywhere as I didn't want to be splitting the cases again for a bearing I didn't bother changing last time. It was a daunting at first, it looked like a complicated mess of things I could
put back together wrong, so I took 1000 photos for reference but it made more sense the deeper I got into it.

I had to purchase myself a blind bearing puller kit to remove some of the bearing, I found a cheap eBay set and awaited its arrival. For the price I paid
I wasn't expecting anything to high quality, and much to my surprise the set was actually pretty good. So, I started the hunt for bearings, which seemed easy at first but got a little trickier as I got into the specialised bearings, I had to go OEM for 2 or 3 bearings if I recall correctly, these took for ever to arrive. I gave all the internals a good clean up, and everything was in pretty good condition, no obvious cracks, or chunks missing from teeth and everything seemed to mesh nicely, Winning!


I blasted the cases and painted them with duplicolor high temp mat black and baked them in the oven to cure the paint. I purchased a
pro-x con-rod kit and sent the kit and crank down to YZ250H so he could drop it into a favourite shop of his and have it installed. I didn’t get a
picture of the crank when I got it back, but the shop did an awesome job of cleaning it all up and making it usable again.

The cases went back together many months after they were split, all went well apart from one bearing retainer I forgot to put in because I assumed
it went with the stator stuff. Had to split the case again while the liquid gasket was still wet, I got it everywhere! I had also purchased a reproduction gasket kit and a seal kit from eBay to put in while I was rebuilding. The seal kit came from an Australian seller and included OEM crank seals at a decent price.

9
Yamaha / 125 G-Banger Project
« on: June 27, 2018, 09:29:34 am »
Hi Gang,

I've been stalking the forum for a very long time now and I thought I should share my project build and add to the forum community.

I caught the VMX bug after a member from the forum YZ250H took me for a VMX practice day while I was visiting them in Brisbane. One day of riding
the old bikes and I was convinced I needed another bike in the shed. I sold my RMZ250 probably 4 to 5 years ago and have only had an ag 4-wheeler since.
So, the hunt began and once again YZ250H happen to locate a bike for me not to far away. A 1980, YZ125G that needed some TLC to get running once again. I picked the bike up May 2016, thinking I could have it running by the end of the year, and maybe a race by mid-2017...


$700 got me what I thought was a pretty complete bike and shouldn't take too much to get running again. How naive I was! It’s now mid-2018 and I still haven't even kicked it over.

The plan for the build has always been, "nothing fancy just get it running", which I often have to remind myself of as I deliberate over to polish, paint
or just put the part back on.

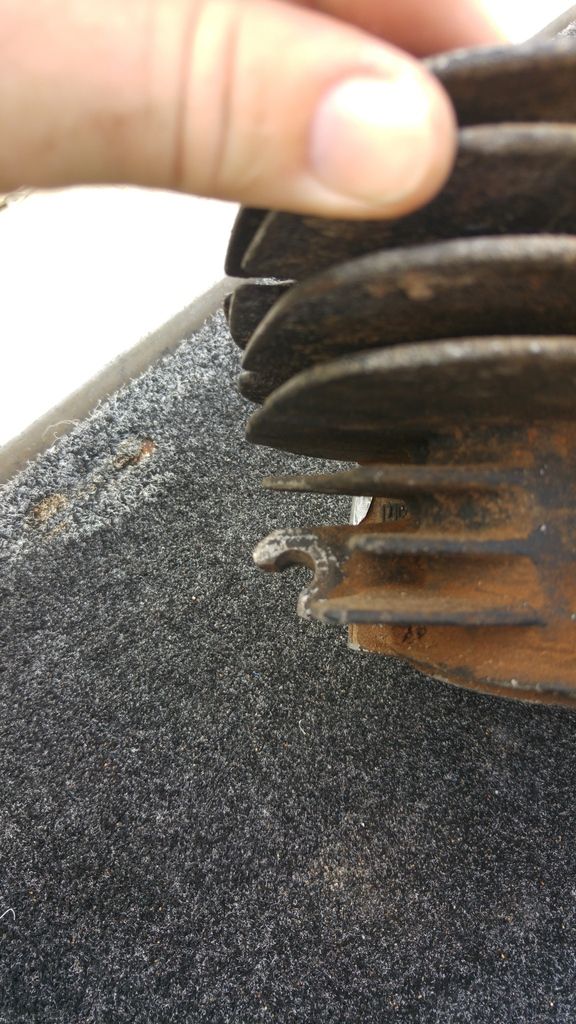
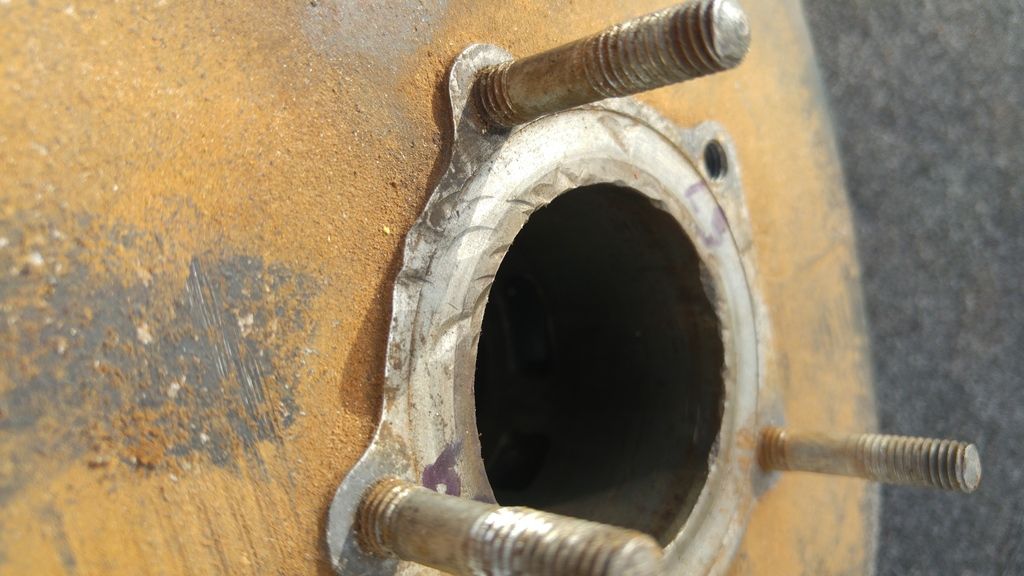
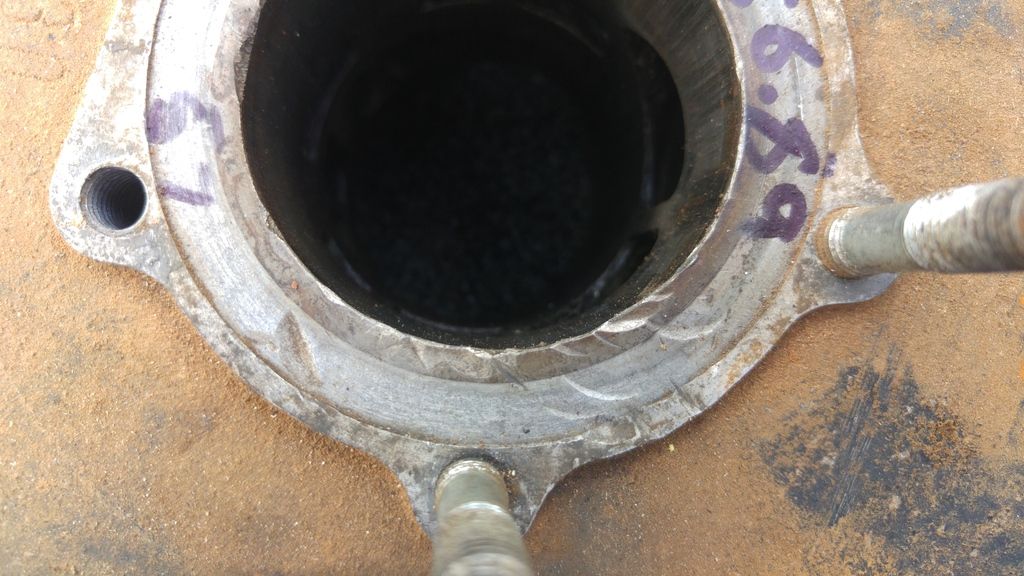
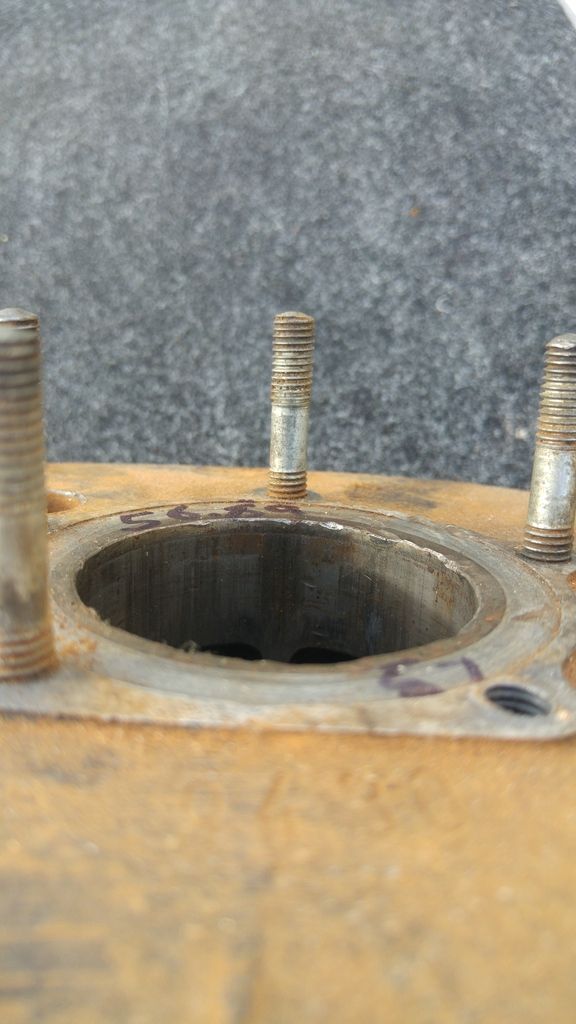
I started with pulling the engine out to sort its issues, the bloke had forewarned me that the engine was buggered and needed a full rebuild, so I was half ready for a slight mess, but I was still shocked to find the cylinder looking like someone had used a jack hammer to remove a seized piston. 


bit hard to make out, but there wasn't much surface left that didn’t have a dent in it.


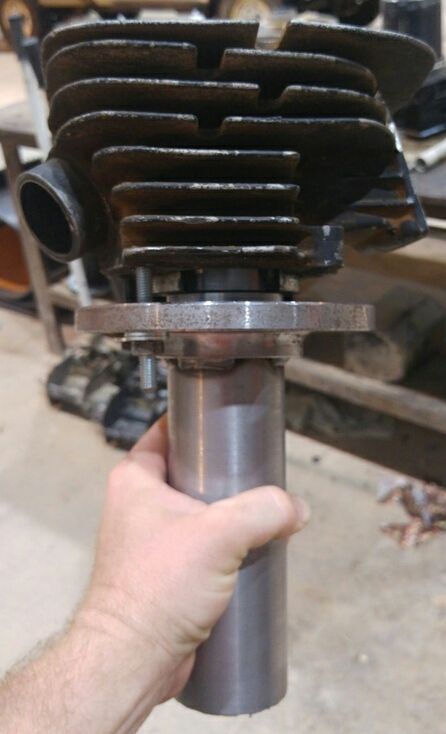
The cylinder was on its last factory over size, so I started to hunt for a cylinder to replace it. I thought I was onto a winner after a few months of searching but it was sold to another person after I was told I could buy it, figured old mate didn't want to ship to Australia if he could sell it locally. Back to the original cylinder I went to work out what I could do. The lads I work with are old school car nuts themselves and while it wasn't a car I was rebuilding, it perked their interests when I told them it was a 1980 model. So, after a few cups of teas a game plan was devised to build "spigot" to mount the cylinder to, so it could be put in the lathe and turned up to smooth out the mating surface of the cylinder.

the cylinder mounts

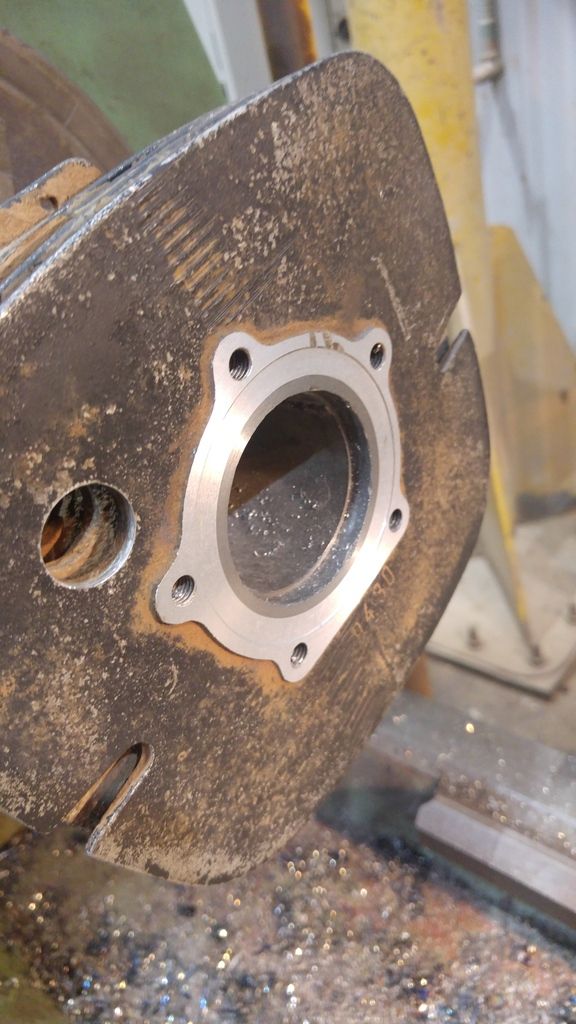
spinning the cylinder up

All but cleaned up. we had to take off 0.35mm the face to get a decent surface that will hopefully seal up nicely.

To be continued...

10
Yamaha / Re: YZ125G stator winding resistance.
« on: June 27, 2018, 08:38:22 am »
Thanks tony27. i think i've worked out the photos.

This is the NOS item i got from the states and it measures 293 ohms, the insulation resistance is above 200 megohms
so it seems the insulation has not broken down either. I've used my digital fluke meter and my kyoritsu analouge just
to double check. very strange indeed.


you can see in the photo that there is no signs of resin or solder on the tails of the winding leading me to believe it really is a
NOS item.

11
Yamaha / Re: YZ125G stator winding resistance.
« on: June 26, 2018, 08:05:37 pm »
Hi alexbrown

Thanks for the reply, it has me in a pickle but! I've got 3 high speed coils that all read around 280 ohms, including a NOS item. I'll dig it out tomorrow to get the part number off it.

I'll try to get some photos together, I've got a random collection on my phone from different stages. Who is everyone using to host photos now photo bucket has gone to poo?

12
Yamaha / YZ125G stator winding resistance.
« on: June 26, 2018, 02:39:17 pm »
Hi Lads,

I'm slowly piecing together my YZ125g project and i've run into a bit of trouble with the stator set up.
I've checked the resistance on both of the coils, one was reading 279 ohms the other 1389 ohms. The
clymer manual ive been using states that the values should be 470 plus or minus 10% and 1470 ohms
plus or minus 10%.

So ive been on the hunt for some replacements and brought a second hand set, that again tested at roughly
the same values. So i figured i had another out of spec "coil 2" and bit the bullet and purchased a NOS
"coil 2" to suit the G. when i checked its resistance it came up with 280 ohms as well.....

So i've done a lot of snooping about and i haven't been able to find a straight answer, does anyone know what the
correct ohm readings should be please?

I did find the following information on this forum and it backs up what readings i have been getting, but some extra clarification
would be greatly appreciated.

Hate to disagree Rusty.
Red to white should be 500 ohms +/- 10%

These are for yz125g and later.
stator readings are
red to white red 270 ohms
brown to red 1437 ohms
10%  variance either way

these are standard readings for nearly all yz125s

The ignition system for the yz125f is actually from the yz80f


Cheers!

13
Wanted / Re: YZ 125G Barrel
« on: March 22, 2017, 05:35:25 am »
Just a quick update on my situation,
After talking to a few people and getting a plan together I decided I would attempt to repair the cylinder myself. I took the barrel into work and showed some of the lads what I had in mind. The lads were keen to help, most of them cars nuts and love anything that has an engine.

First up we spun a pipe up to fit perfectly up the bore, a bevel was cut onto the pipe to match the slight bevel on the bottom on the cylinder.  this was to try to help with keeping everything square to the pipe. A flange was welded to the pipe to line up with the mounting holes of the cylinder.


We then stuck the set up in the lath and spent a fair bit of time getting it to spin true. Once that was sorted, we took 0.05mm cuts off the inside face untill 90% if the dents were sorted. We then took the same amount off the outside edge
.


I'm pretty stoked with how it all turned out. Only had to take a total of 0.35mm off to clean it all up. I was expecting a lot worse.


14
Wanted / Re: YZ 125G Barrel
« on: March 04, 2017, 06:45:15 am »
Hi YZ250H

Sorry about the slow reply!


It was just recently suggested to me that maybe I could have the damaged section machined down smooth and then adjust the squish/clearance by changing the thickness of the base gasket. The person who told me this said thats how they adjust the clearance on their KTM.

Thoughts?

15
Wanted / Re: YZ 125G Barrel
« on: February 22, 2017, 09:27:57 pm »
Hi Digga,

I'm the brother in law who is on the hunt for the g cylinder. Is the cylinder you have 2mm over? I'm in North QLD.

Pages: [1]